Parcel card
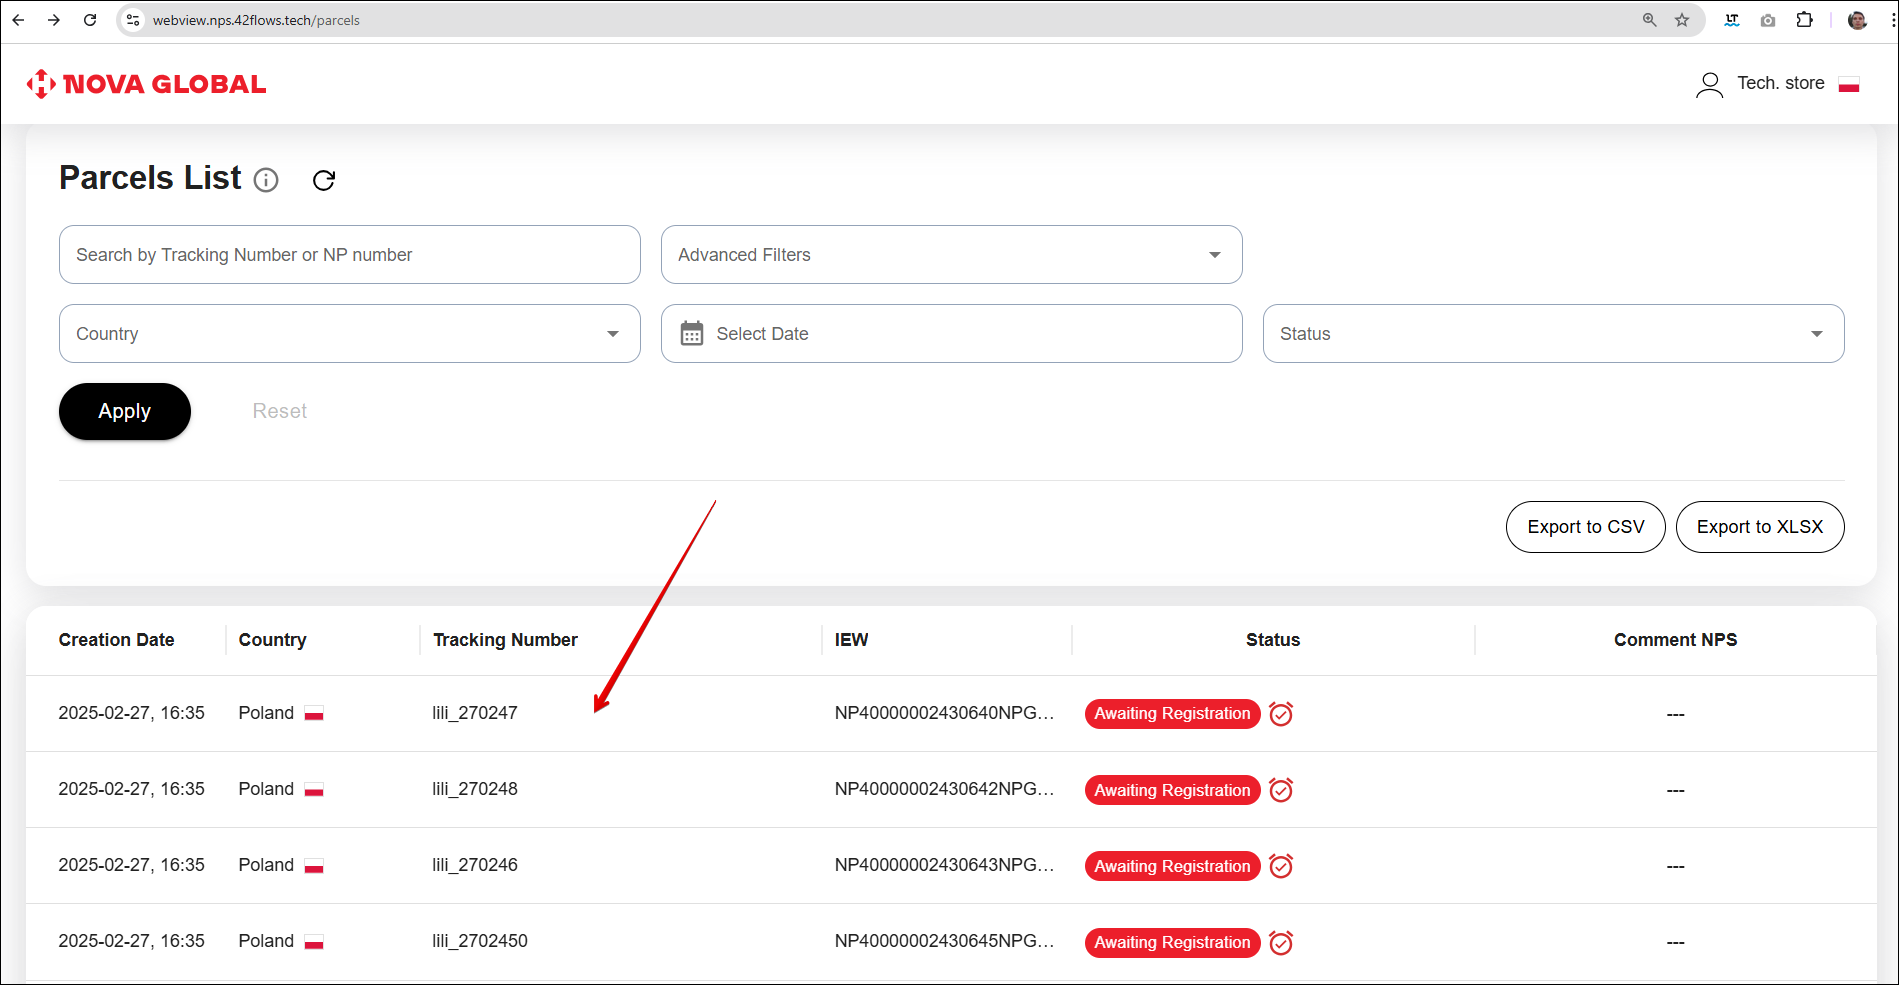
To open the parcel card, click to the record with the required parcel from the list. Regardless of which column or row you would click to, you will be redirected to the Parcel card page.
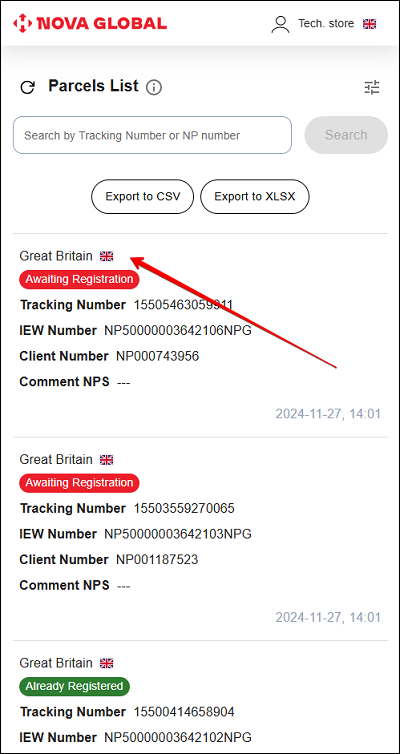
Parcel card for all countries
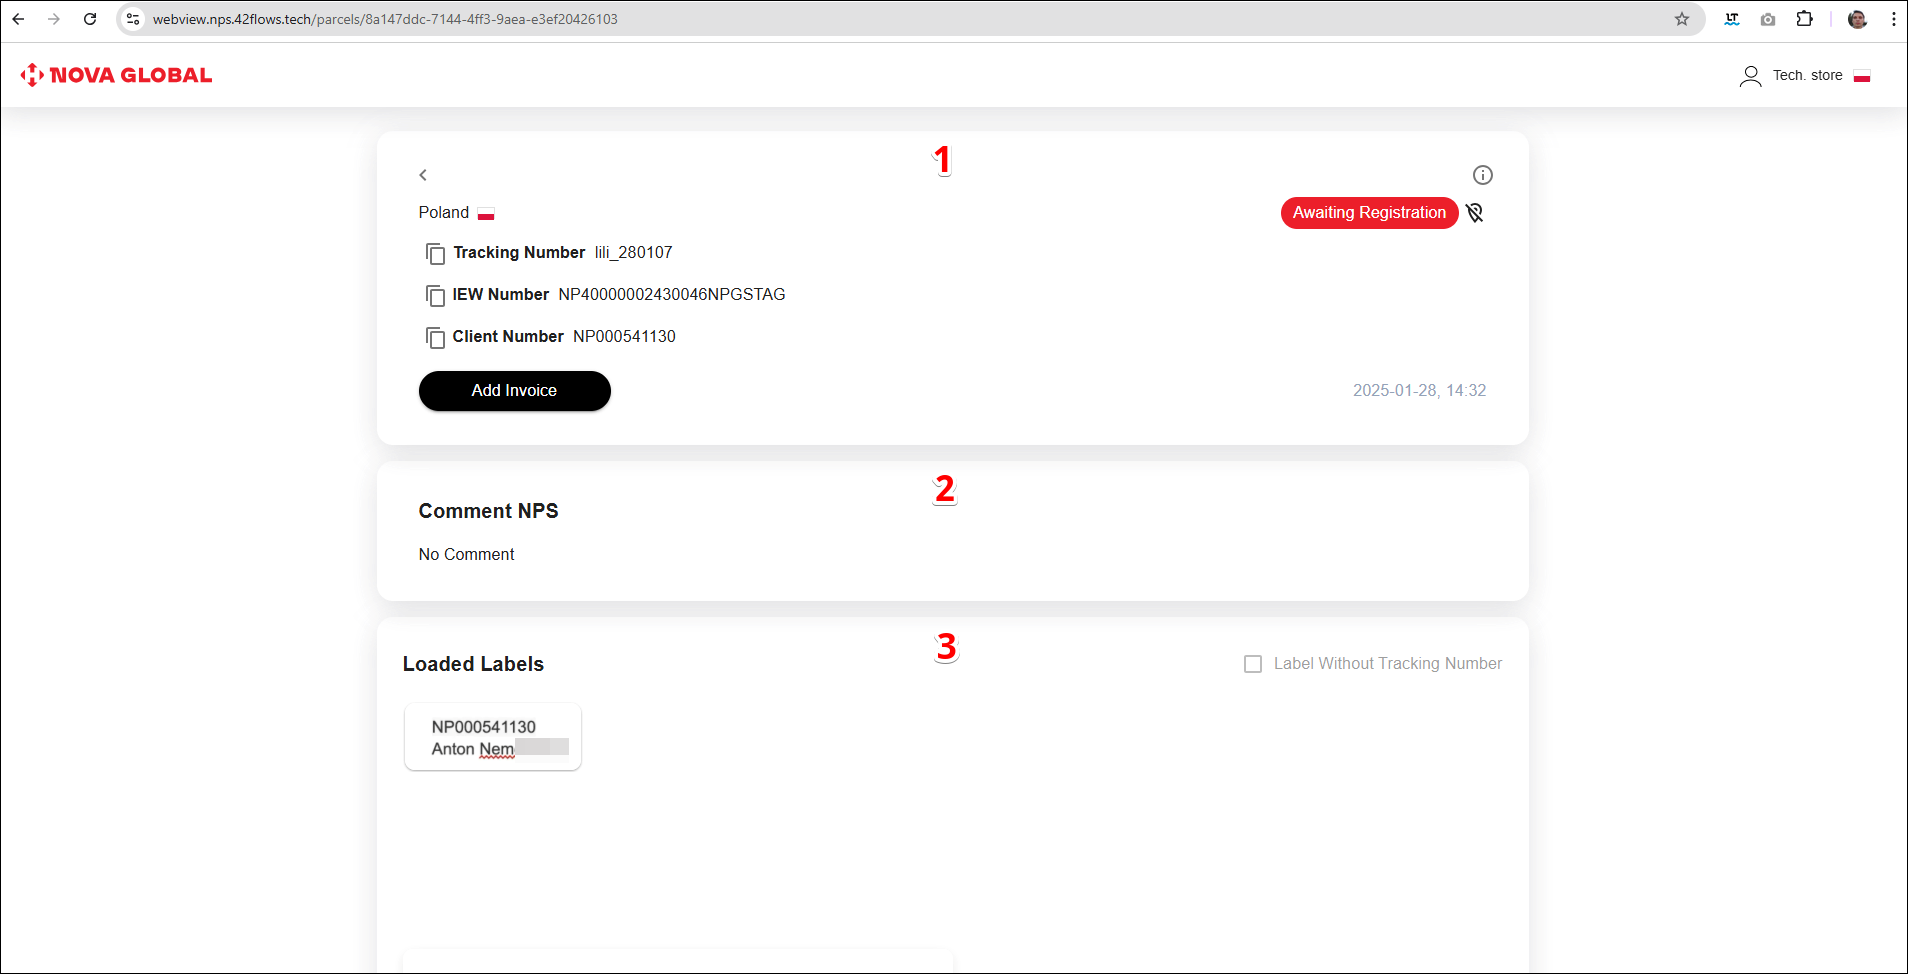
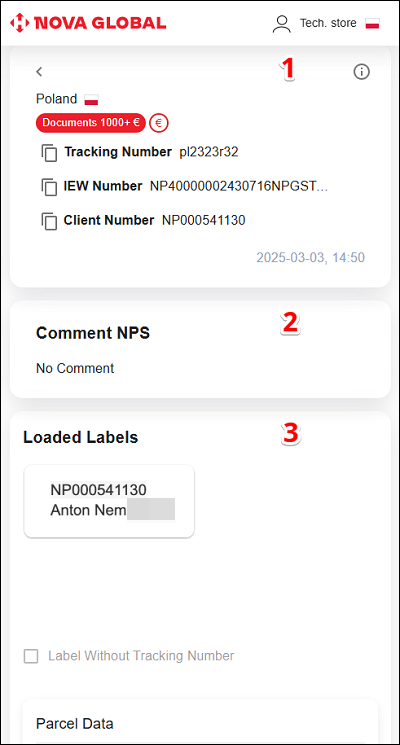
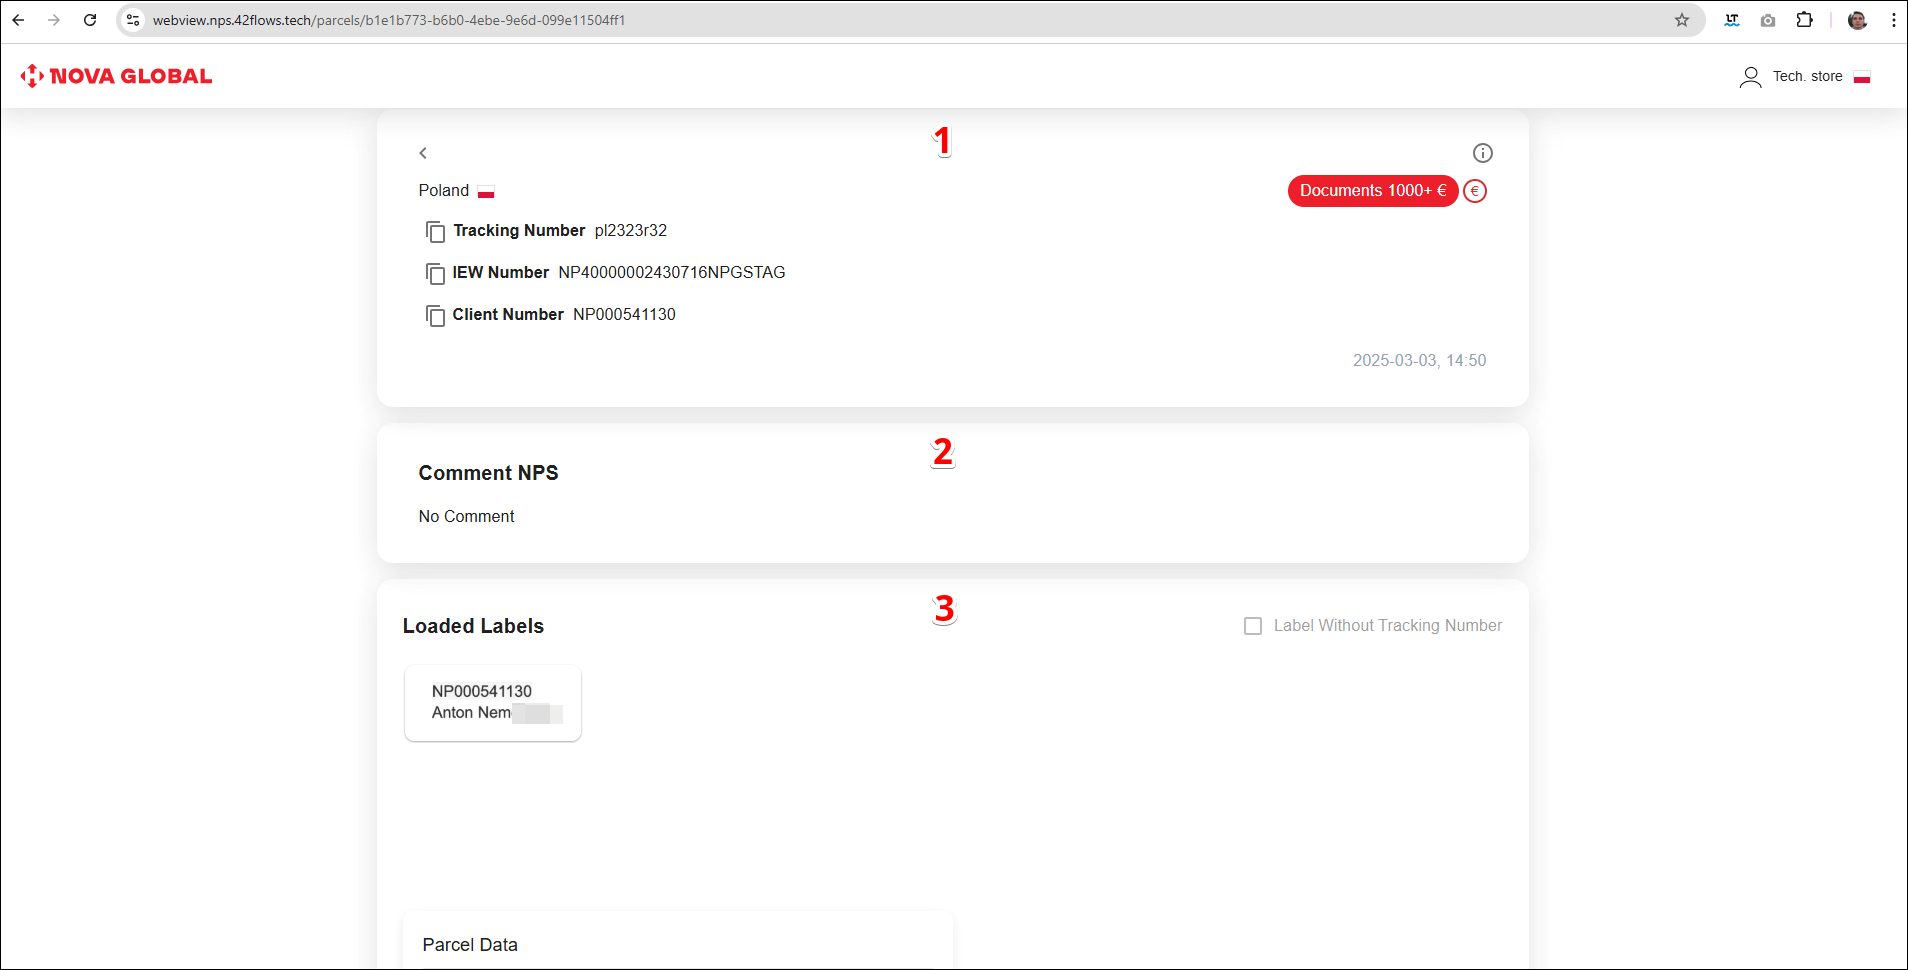
The Parcel Card page contains the following information about your parcel:


| # | Field |
|---|---|
| 1 | Name of the country of the first mile |
| 2 | Parcel status |
| 3 | Tracking Number |
| 4 | IEW Number |
| 5 | Client Number |
| 6 | Date and time of shipment creation |
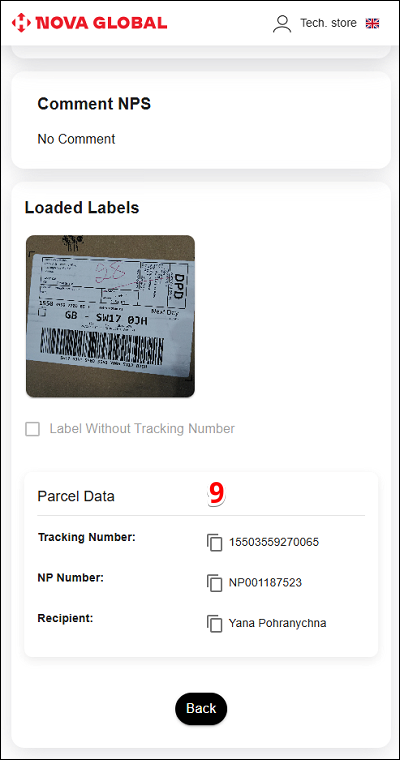
| 7 | Comment NPS |
| 8 | Loaded Labels (if available) |
| 9 | Parcel Data: |
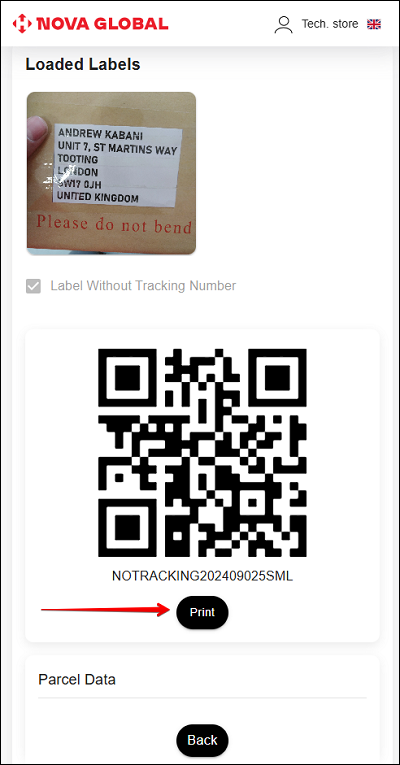
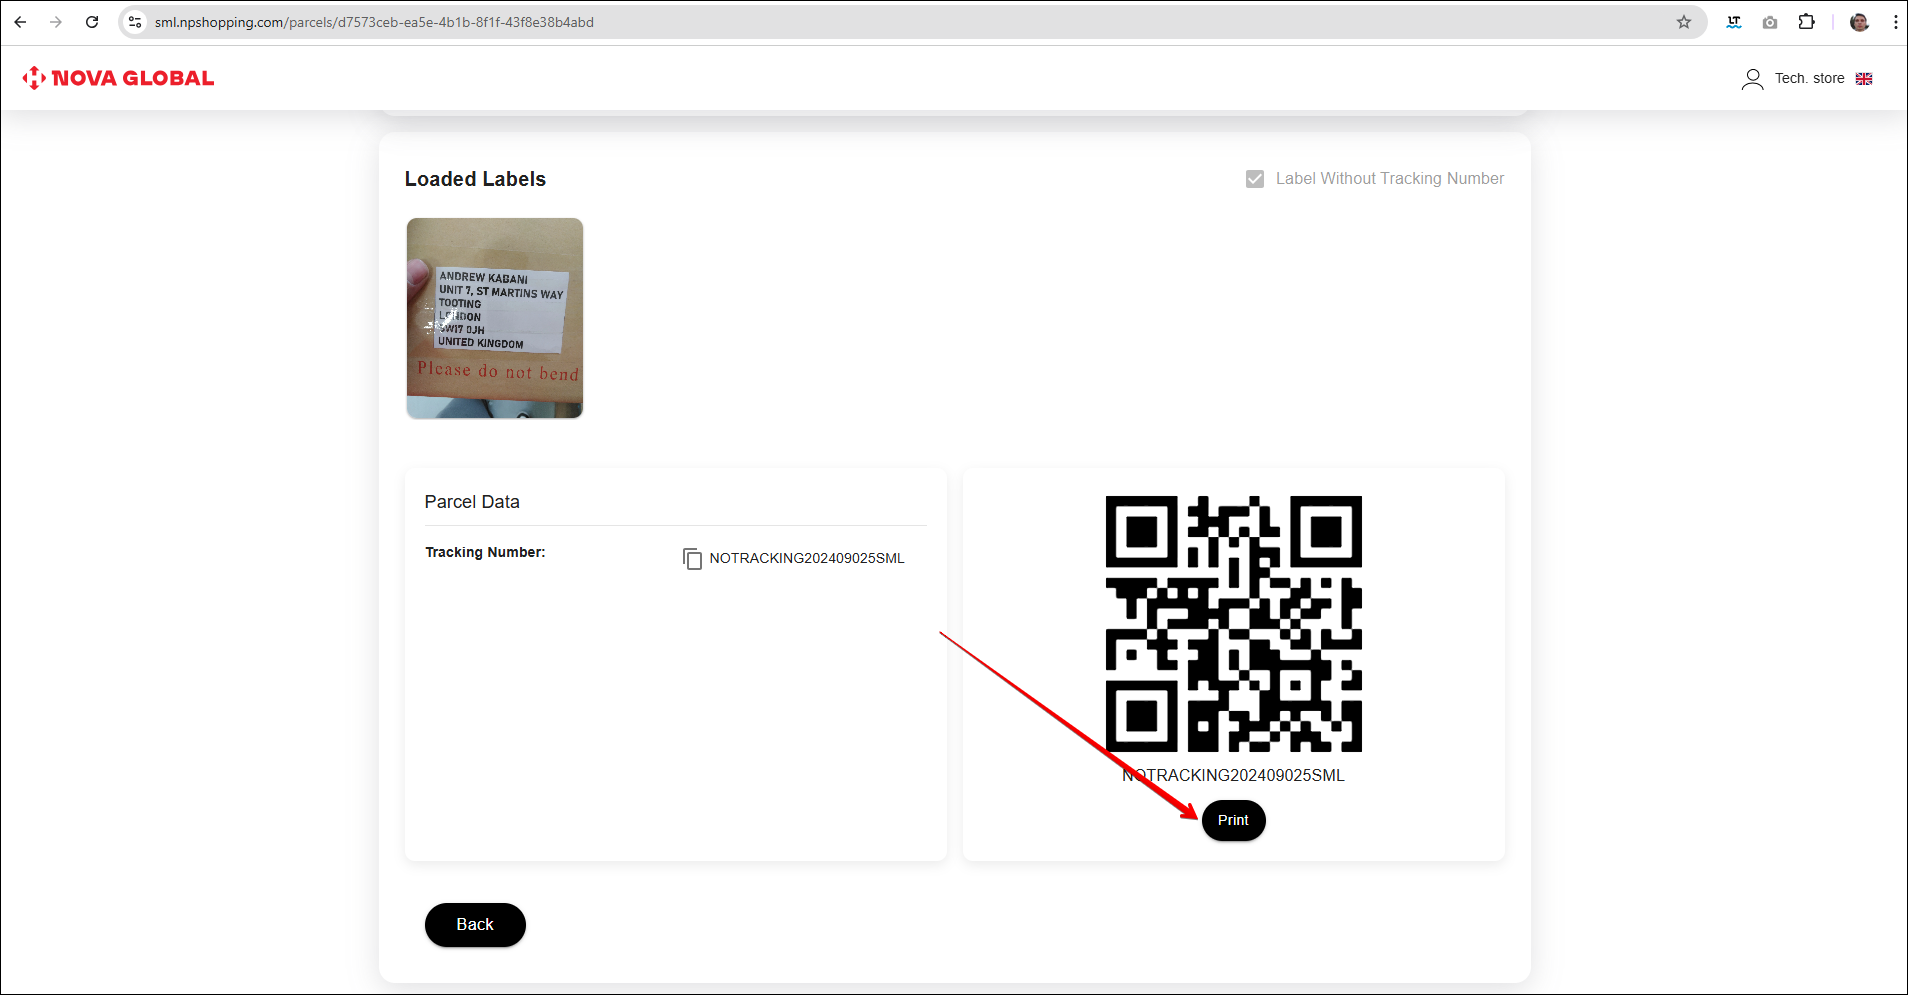
Parcel with status TN Generated, Awaiting Registration
Parcels without track number (parcel with TN Generated, Awaiting Registration the status), include the display of QR and TN, it can be printed by clicking the Print button in the parcel card.
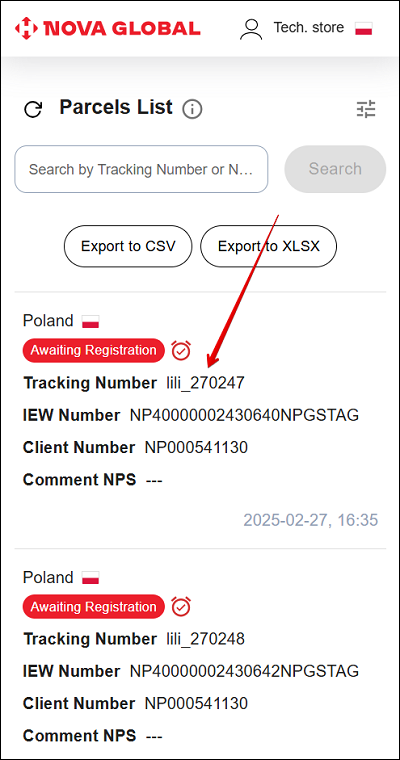
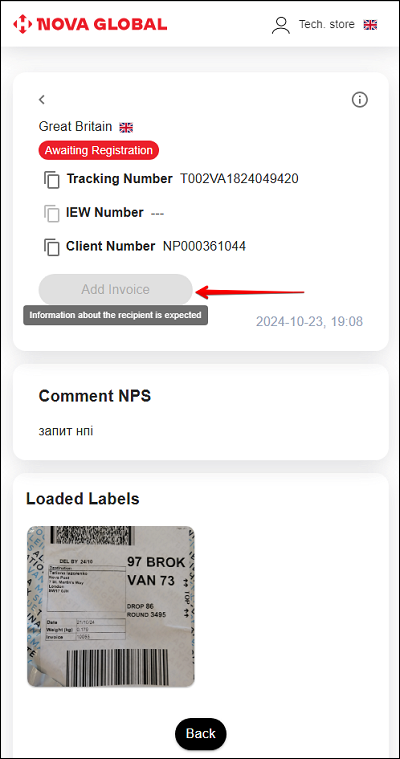
Parcel with Awaiting Registration status
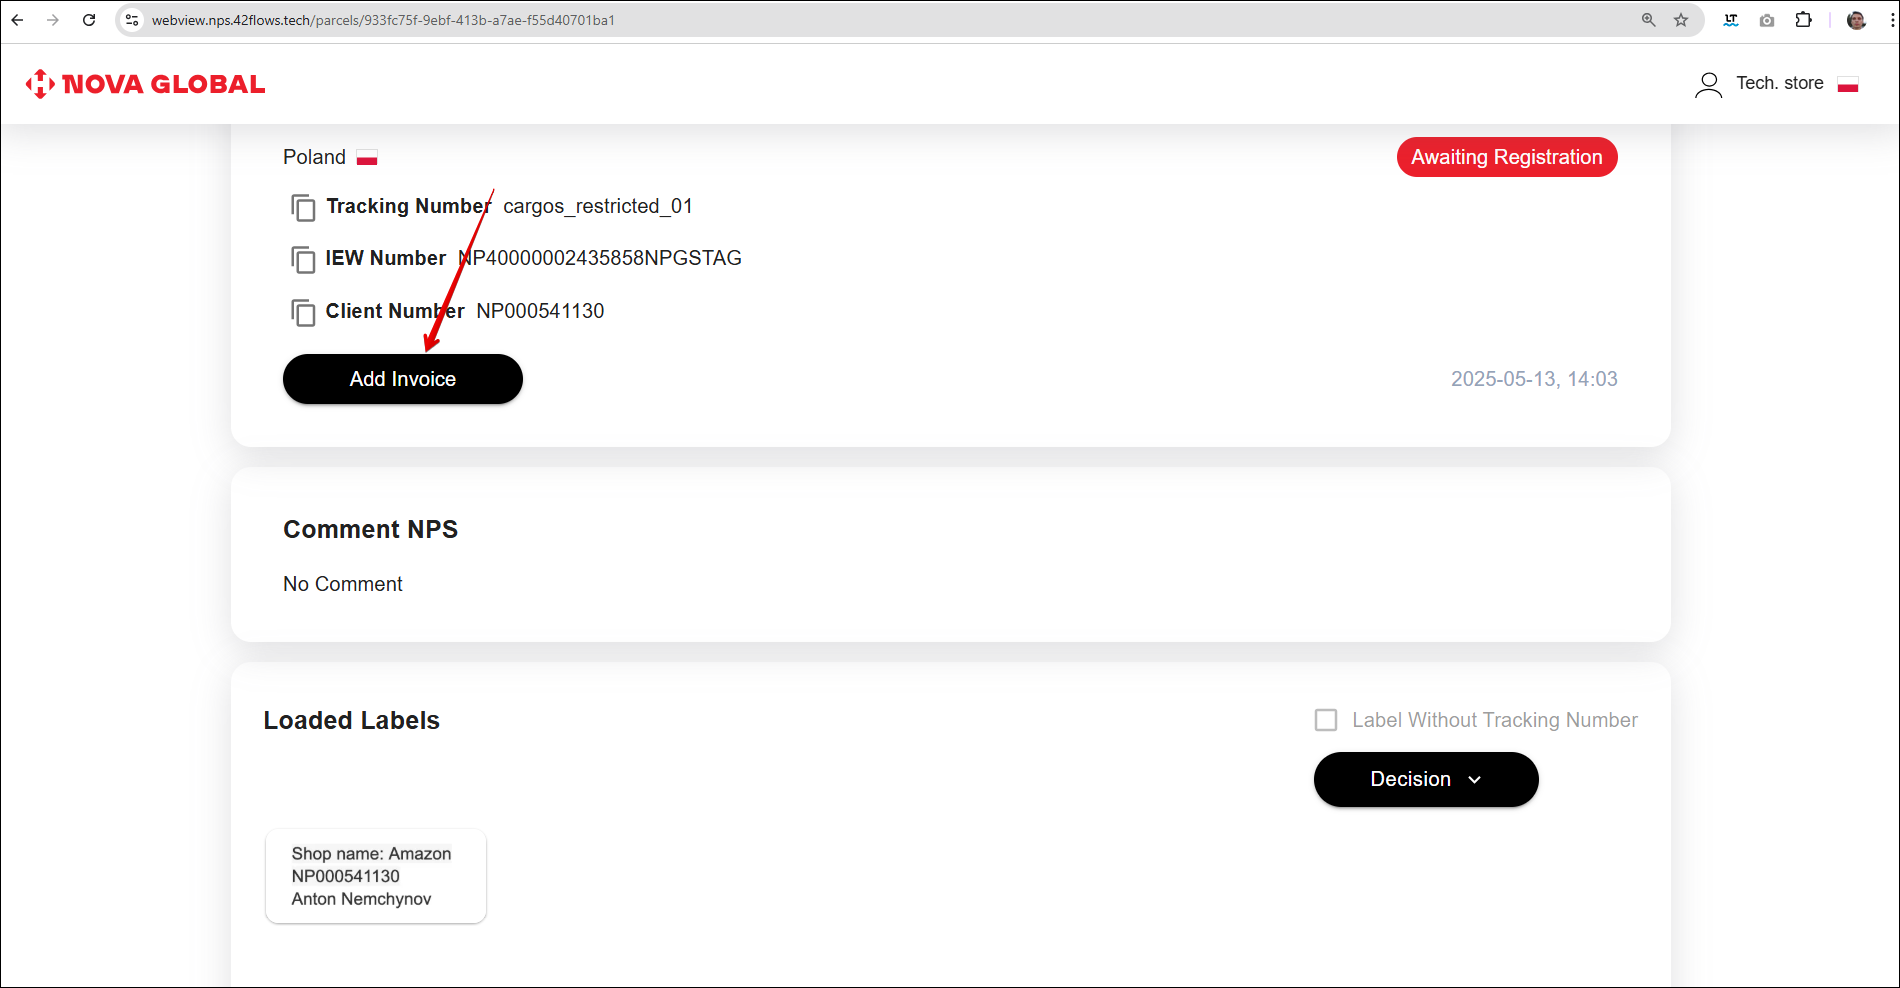
If the parcel has been assigned the Awaiting Registration status, it means that the parcel, along with the data from the label, has been successfully saved in the NPS system and is awaiting registration by the customer—provided that 24 hours have not passed since it was added as unregistered (a timer will be displayed in the Parcel Card). If this time period has expired, the Add Invoice button becomes available to the Tech.store employee.
To go to the card page, click on any parcel from the list.
The parcel card is divided into the following blocks:

| # | Title | Description |
|---|---|---|
| 1 | Parcel information | Allows you to view the following information about your parcel:
|
| 2 | Comment NPS | Allows you to view the manager's comment, if any. |
| 3 | Loaded Labels | Allows you to view the parcel's NP number, sender's details, and copy the following parcel data:
|
To copy the parcel data, click the Copy icon.
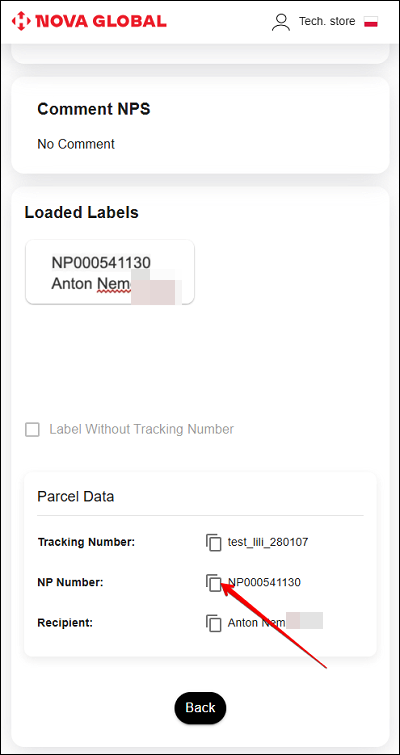
The copied parcel data will be saved to the clipboard
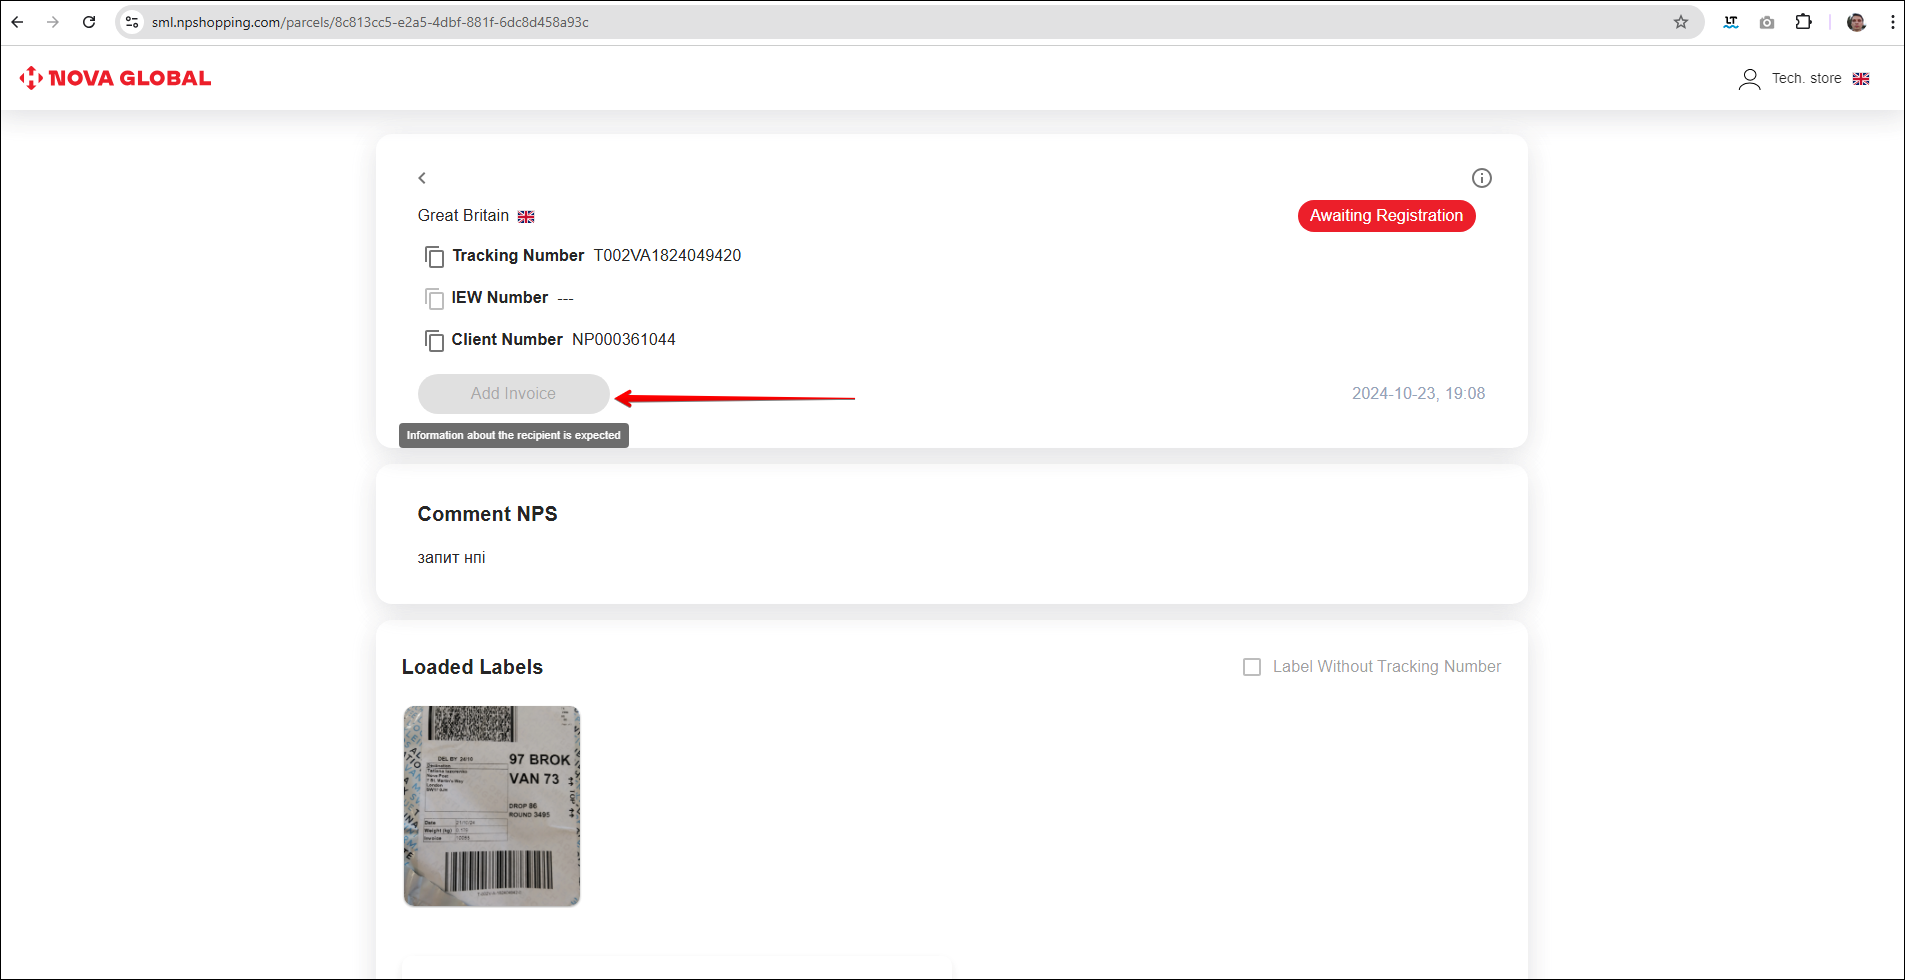
Desktop version
| # | Title | Description |
|---|---|---|
| 1 | Parcel information | Allows you to view the following information about your parcel:
|
| 2 | Comment NPS | Allows you to view the manager's comment, if any. |
| 3 | Loaded Labels | Allows you to view the parcel's NP number, sender's details, and copy the following parcel data:
|
To copy the parcel data, click the Copy icon.

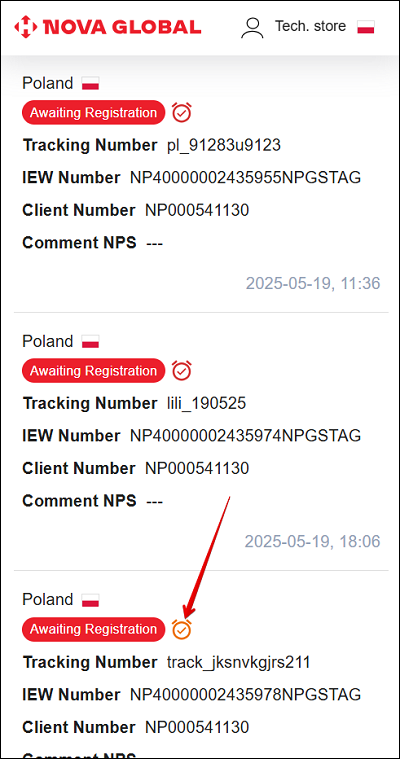
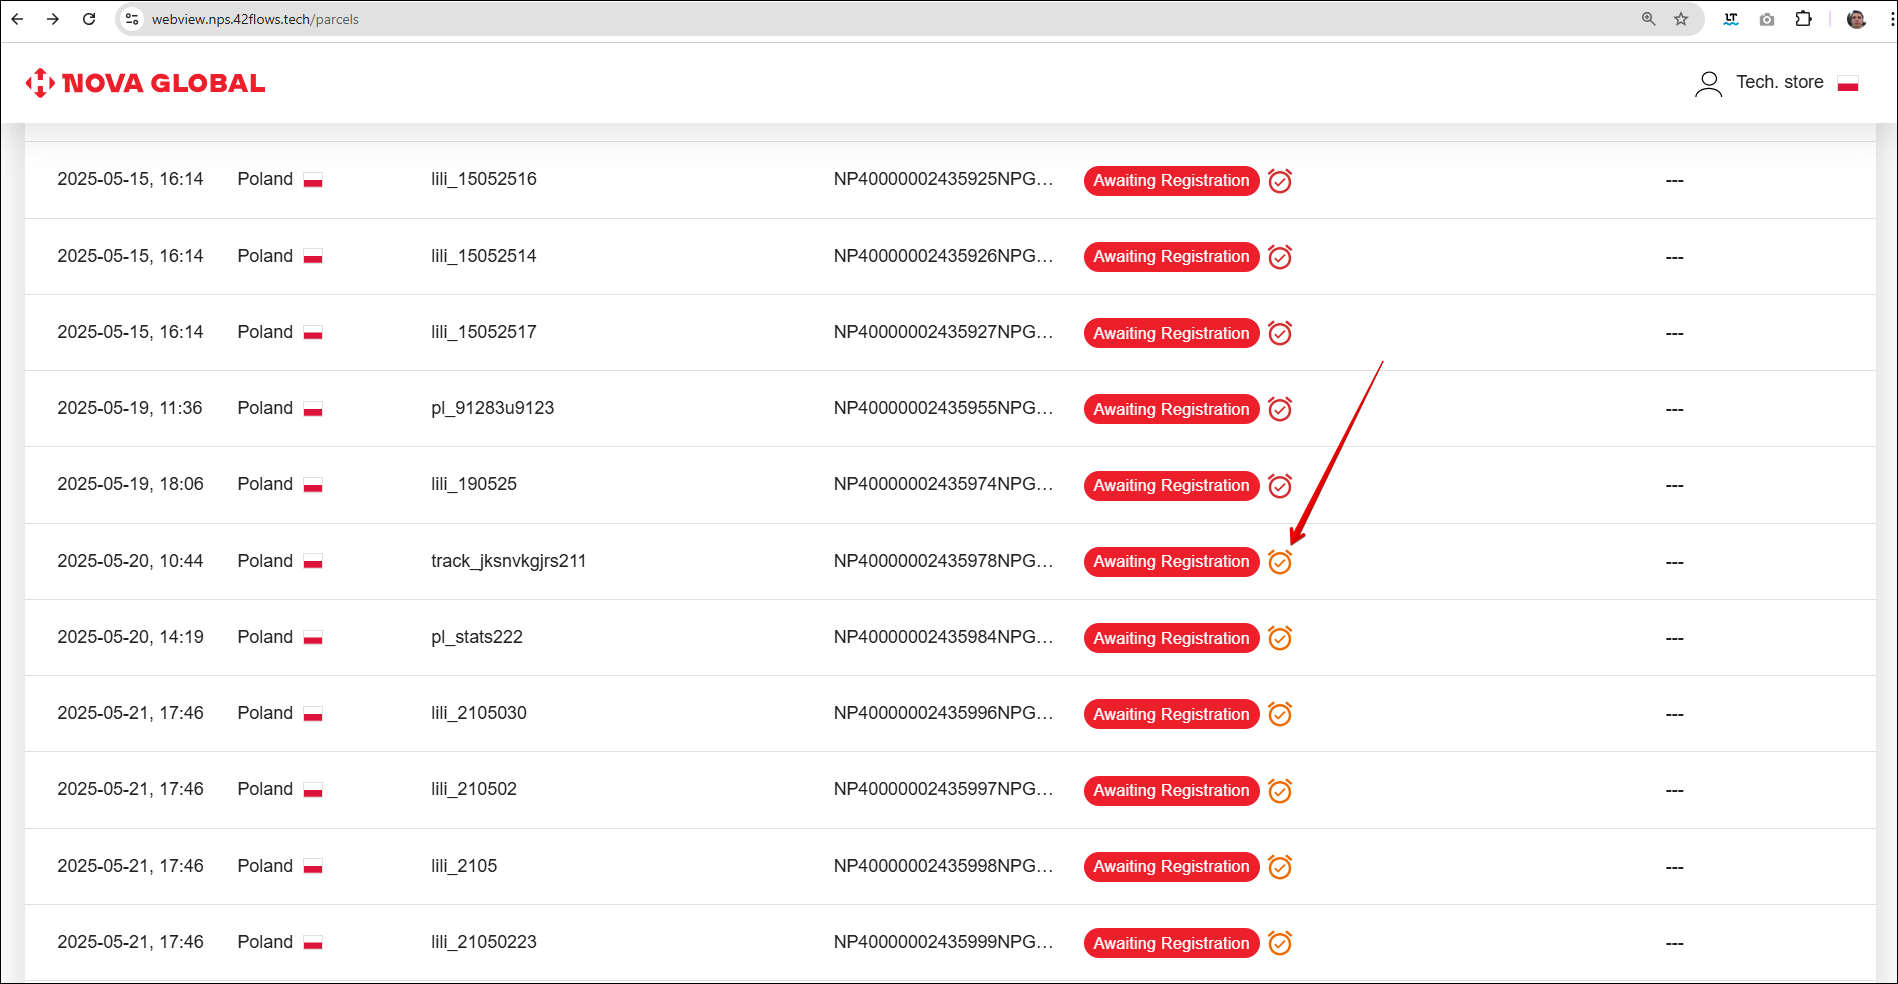
Declared parcels are displayed in the parcel card with a clock icon and are sorted to display from the longest available time to the shortest:
- Red clock - declaration is available for more than 48 hours;
- Yellow - declaration is available within 12-48 hours;
- Green - declaration is available within the next 12 hours.
If the recipient's data is specified in the parcel, a 24-hour timer starts for user registration (there will be a timer in the parcel card).


If the time has elapsed, the warehouse employee needs to add an invoice.

If a parcel with the Awaiting Registration status does not display a timer icon, it means that the parcel is ready for registration, but the technical staff member cannot add an invoice yet. In the parcel card, you can see an inactive Add Invoice button with a timer for 24 hours. When you hover over the Add Invoice button, an information message appears:
Data about the recipient is expected
As soon as SML receives the recipient data from the managers, the 24-hour timer is automatically activated in accordance with the previous paragraph.
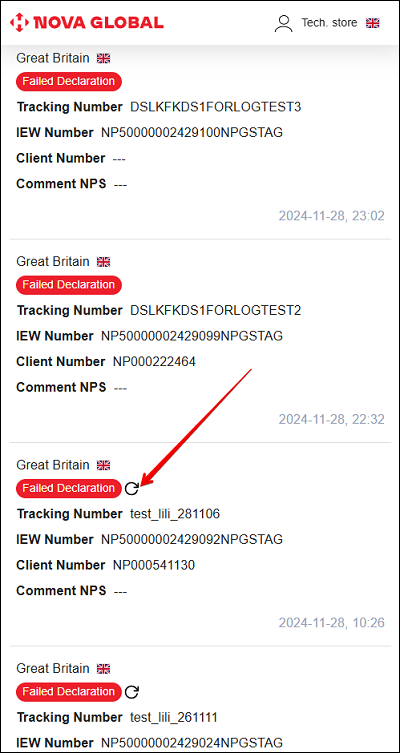
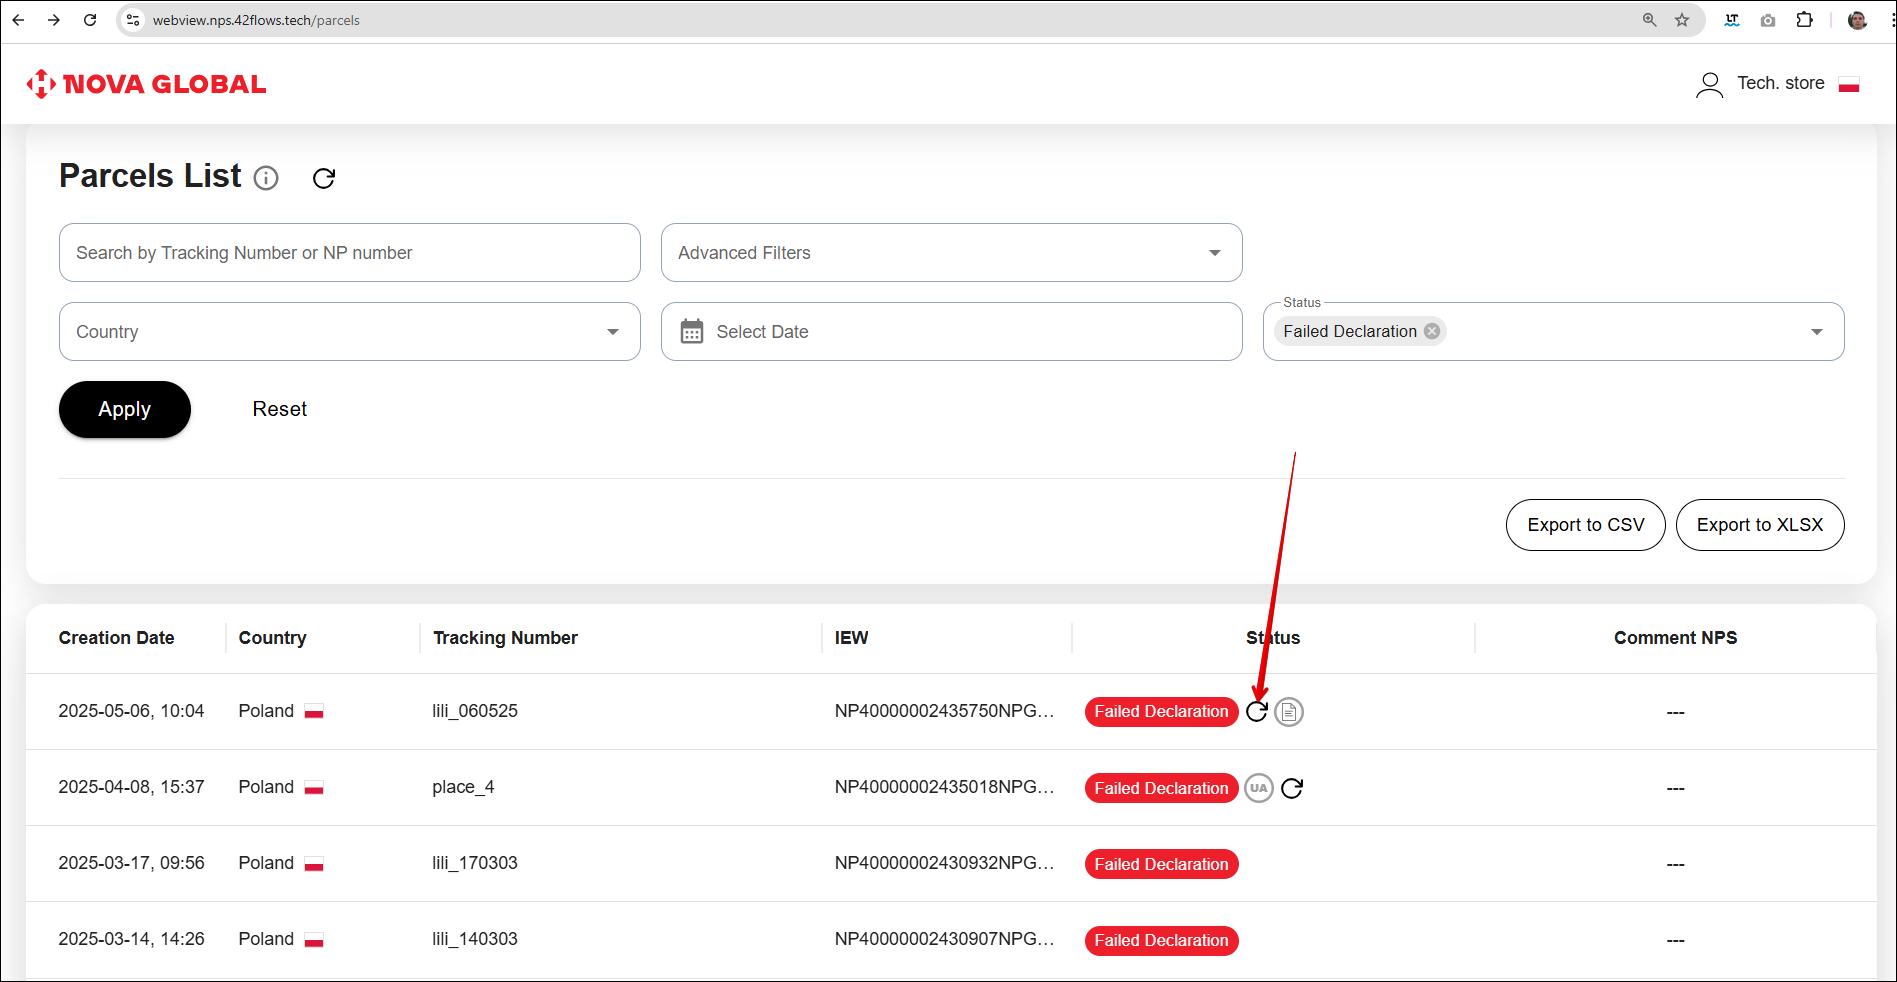
Parcel with Failed Declaration status
If the parcel was not successfully registered, it is assigned the Failed Declaration status. The Tech.store employee has the option to re-add the invoice up to two times if the first attempt was unsuccessful. On the Parcel Card page, the option to re-add the invoice is represented by a corresponding icon. Hovering over the icon displays the number of remaining attempts.
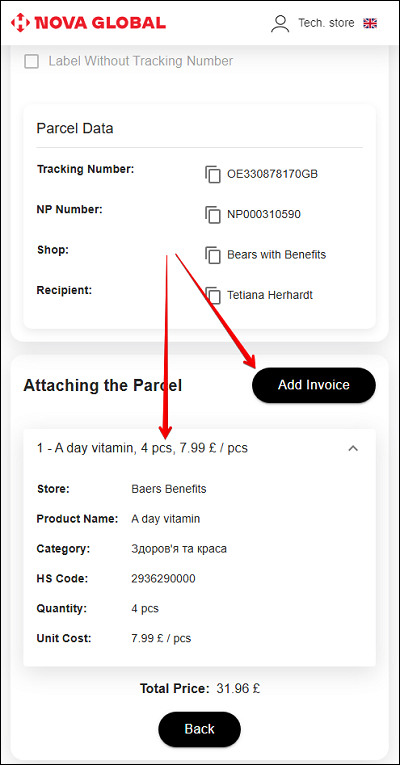
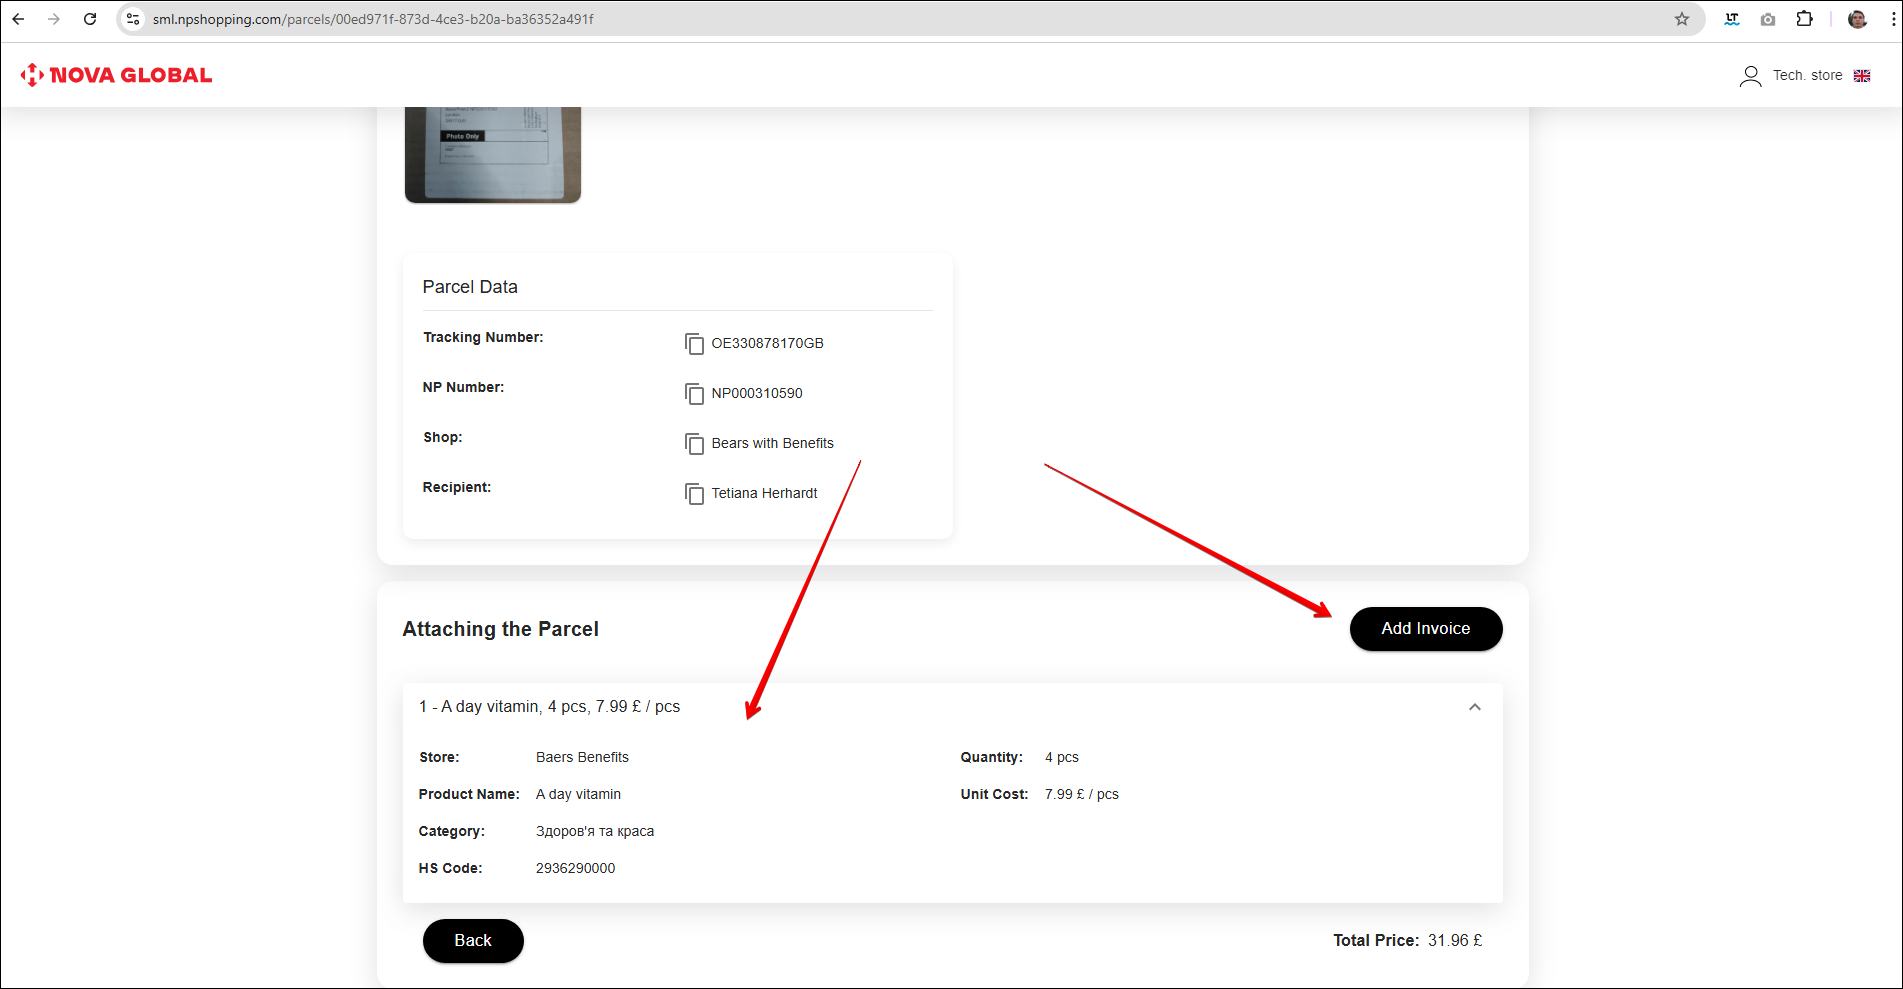
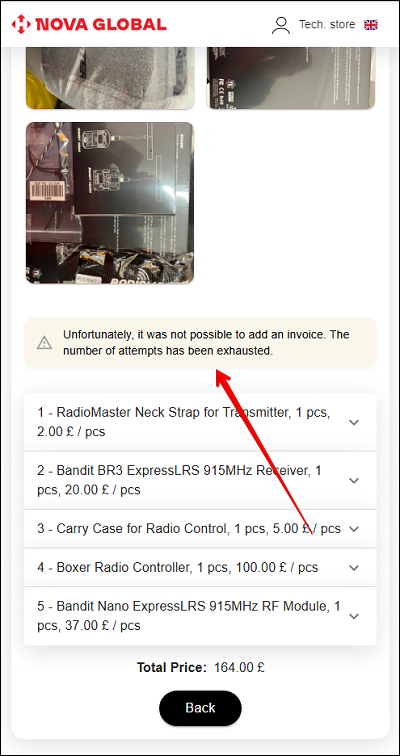
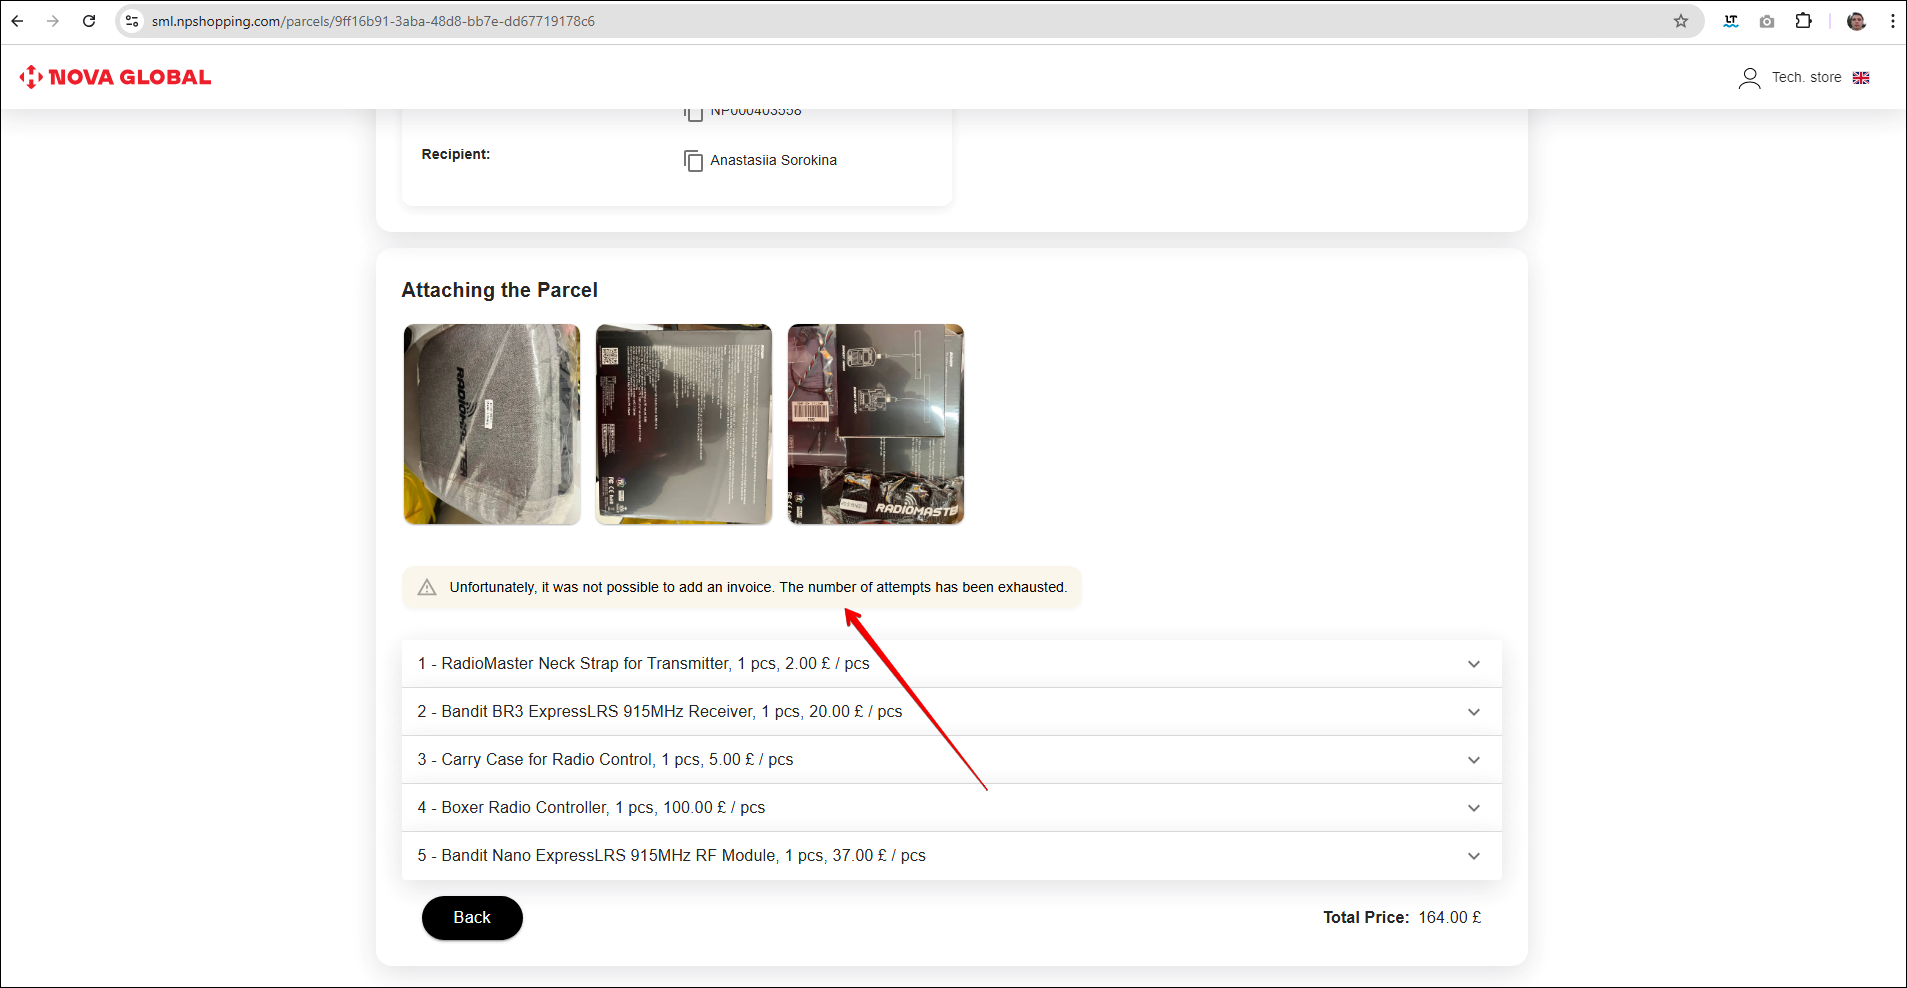
To add an invoice again, you need to go to the parcel page. In the Parcel attachments block, there is an Add invoice button. It also shows the details of the items that could not be added due to an error.
To add an invoice, click the Add invoice button.
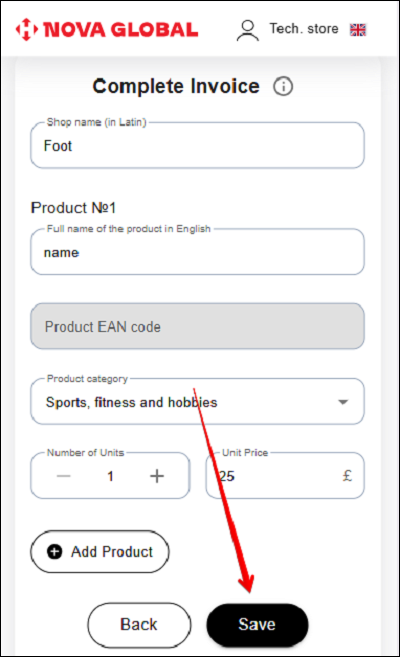
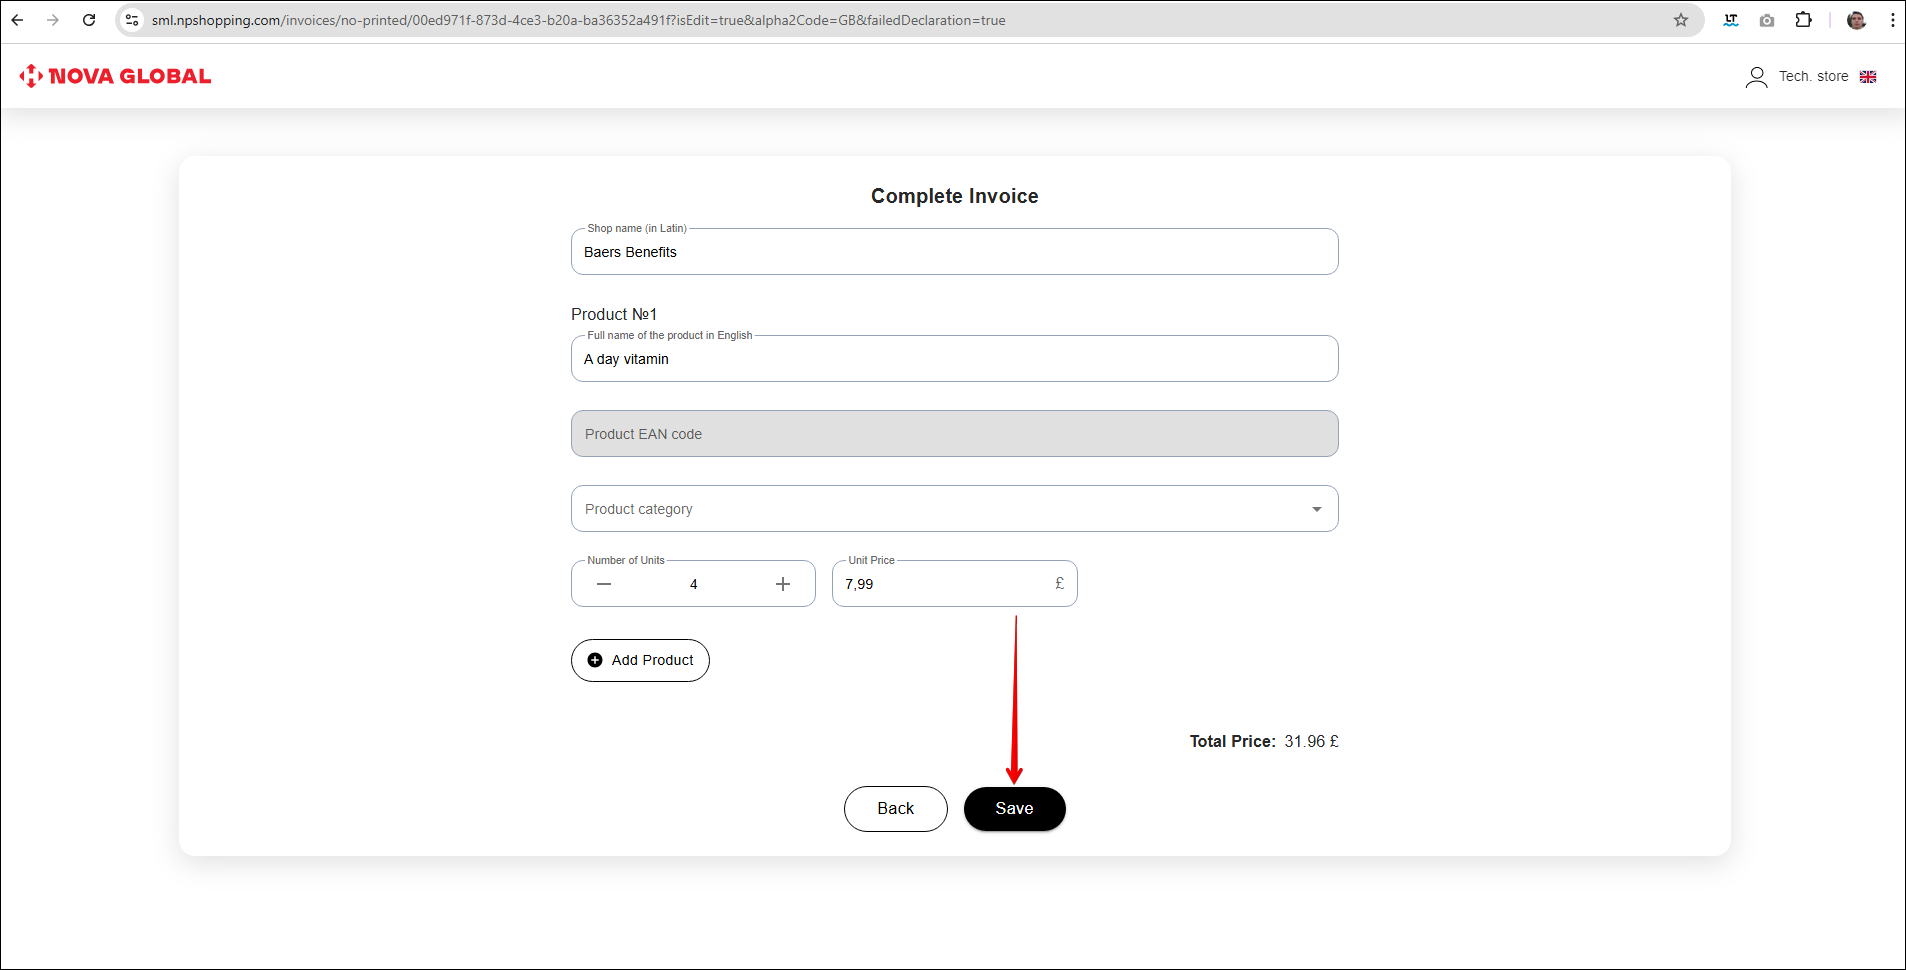
If all fields were already filled and do not require any changes, the Save button will become active. Clicking it will repeat the process of the data save.
If all attempts to re-add the invoice have been used and the parcel remains in the Failed Declaration status, the Add Invoice button in the Parcel Attachment section becomes unavailable. In this case, you must contact support. A warning message will appear in the system.
Unfortunately, it was not possible to add an invoice. The number of attempts has been exhausted
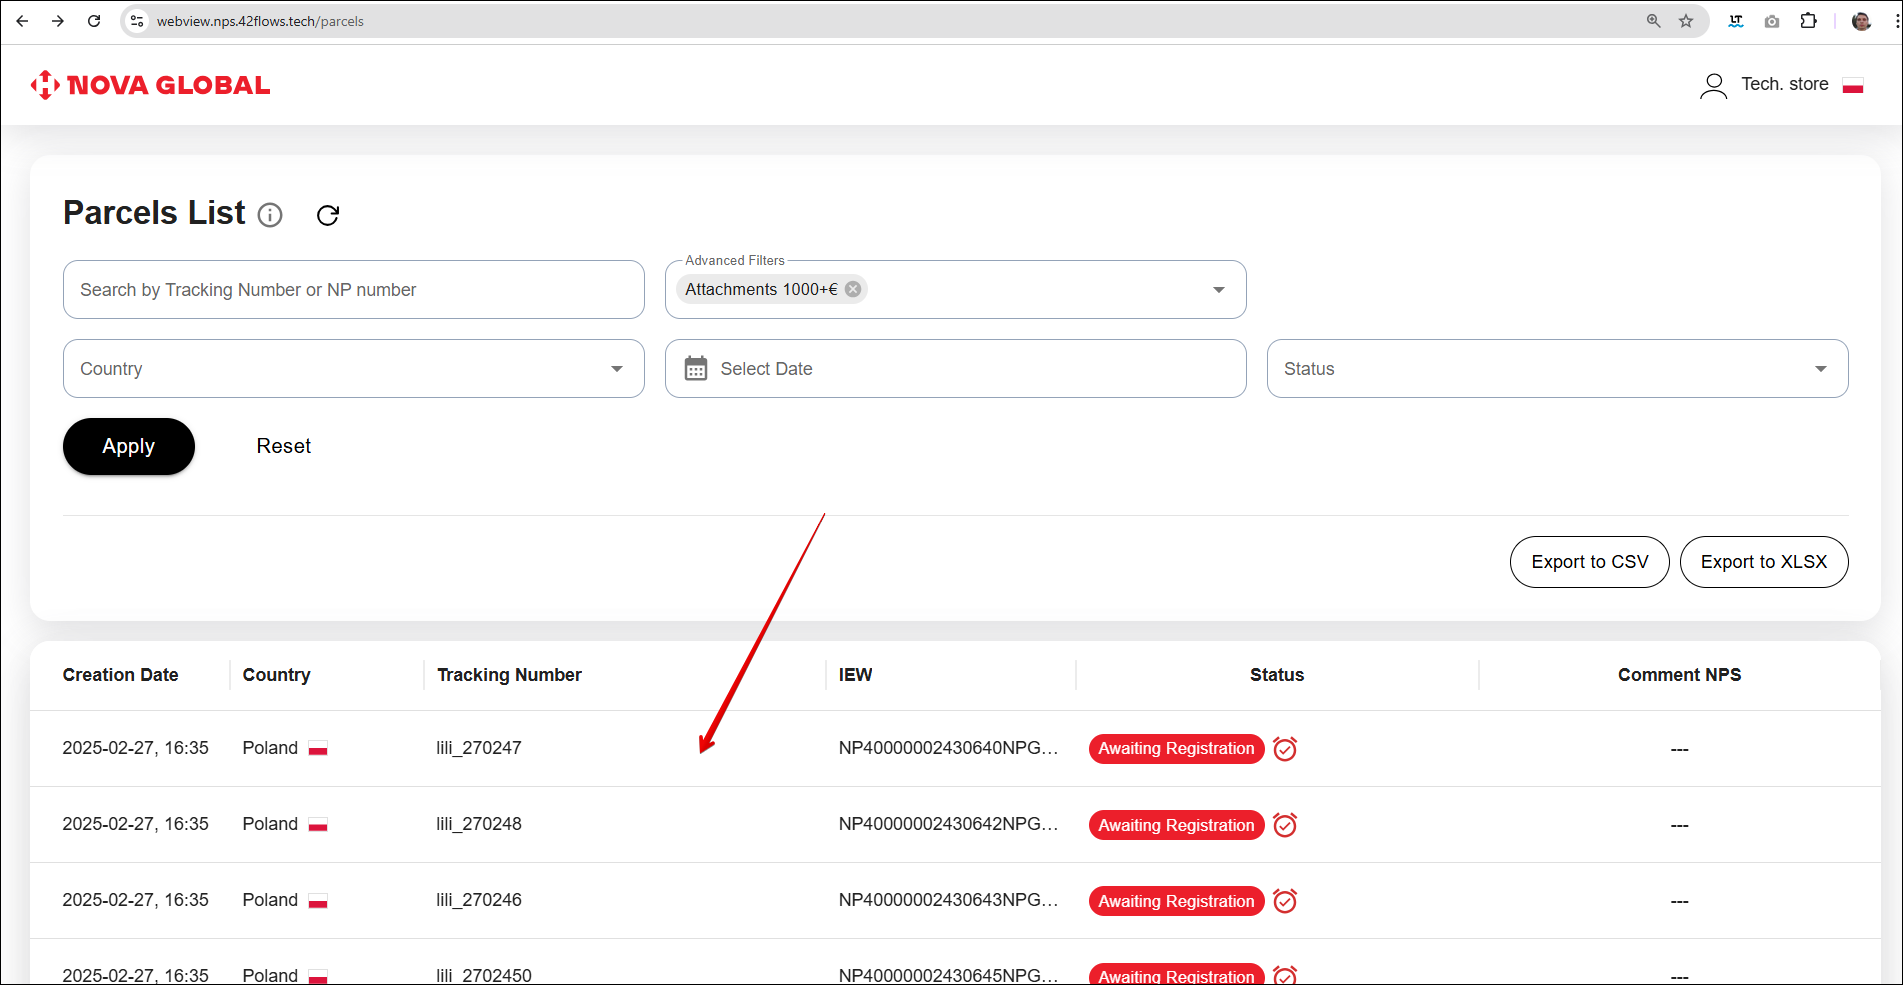
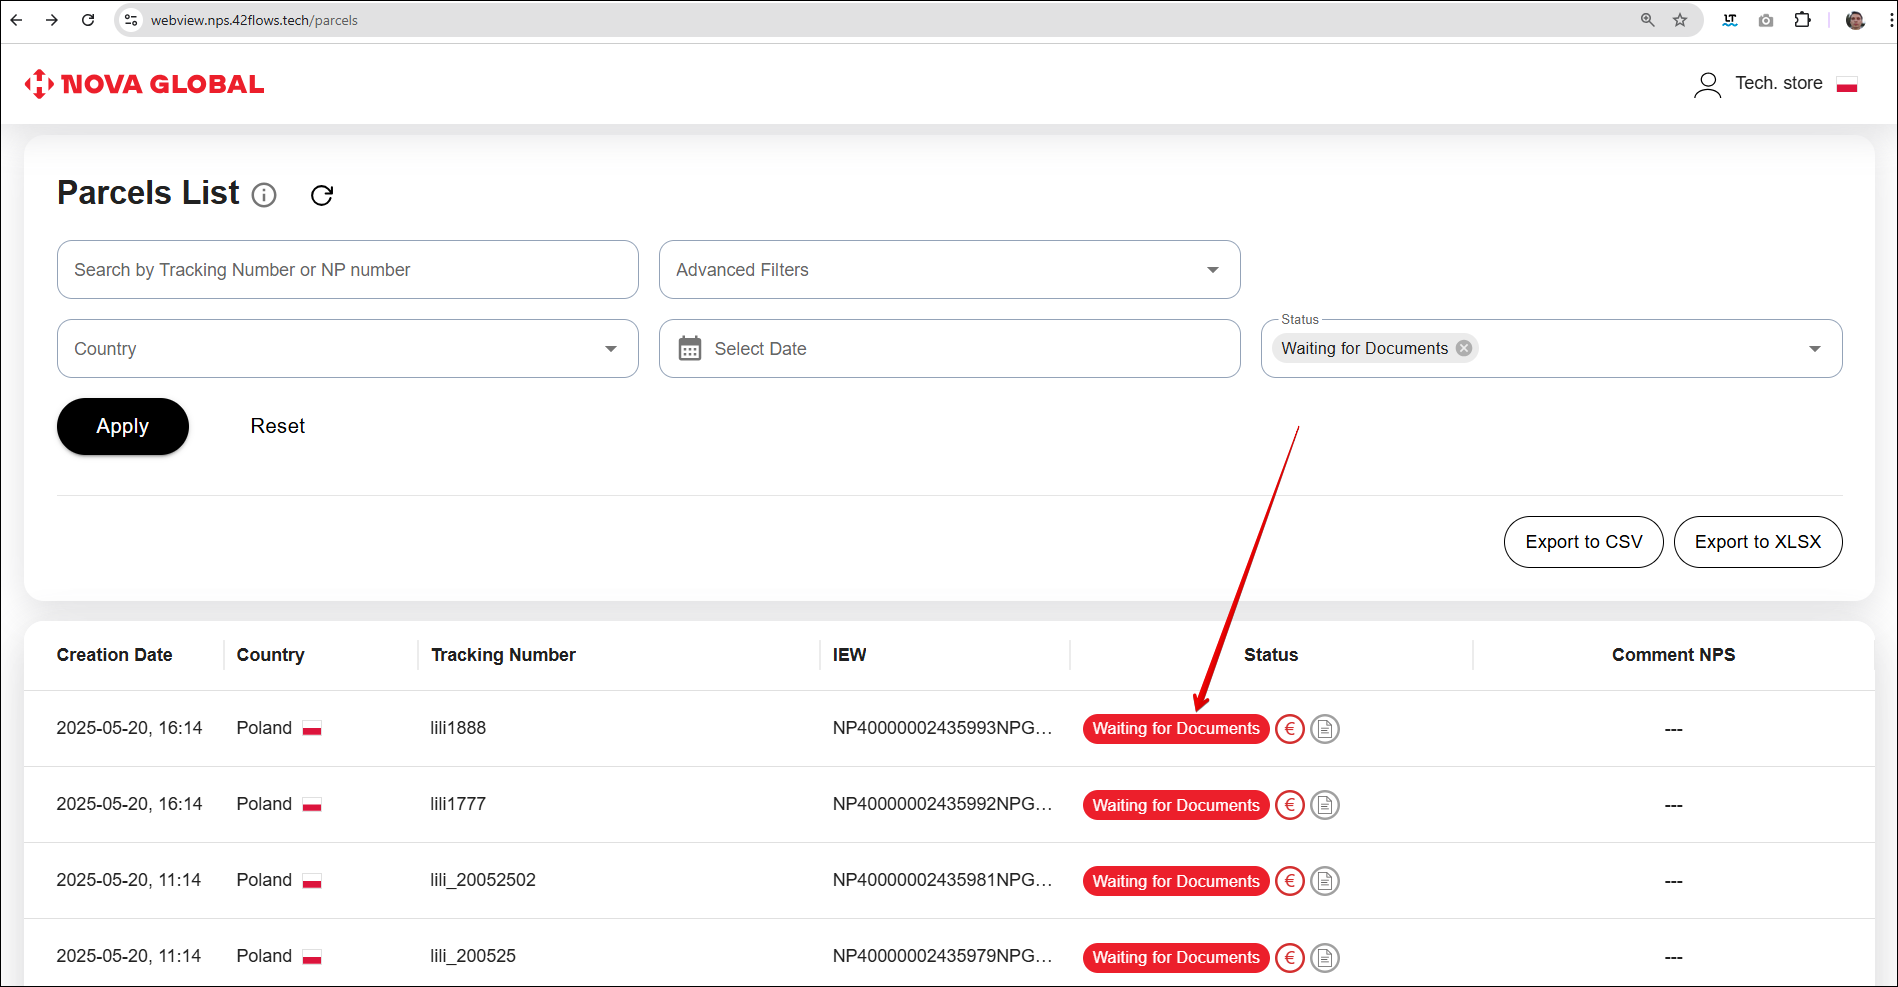
Parcel card for the country Poland
The main difference between parcels from Poland and those from other countries lies in the handling of parcels valued over €1,000.
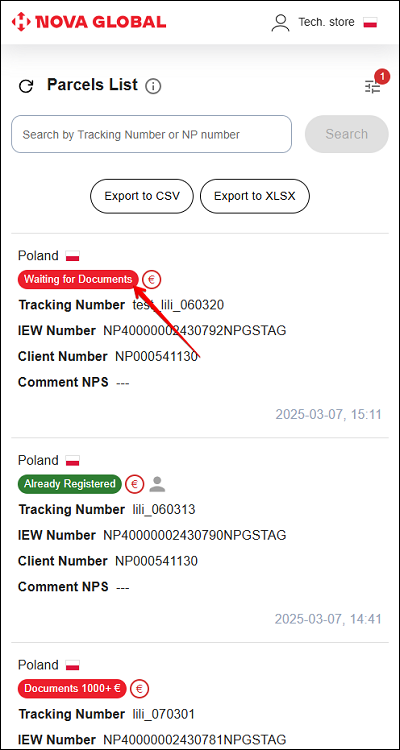
If a parcel is in the Waiting for Documents status, this indicates that its value exceeds €1,000. In such cases, the Tech.store employee must wait for the user to upload documents confirming the parcel's declared value. Once the recipient submits the necessary documents, NPS forwards them to Tech.store. The parcel is then assigned the Documents 1000+€ status, and the Tech.store employee must forward the documents to the person responsible for processing.
If the parcel initially arrives with the Documents 1000+€ status, it means the required documents are already attached. The Tech.store employee should immediately pass them on to the responsible party.
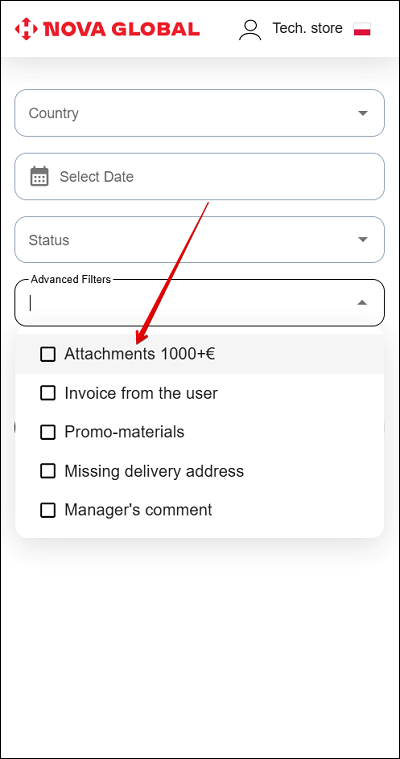
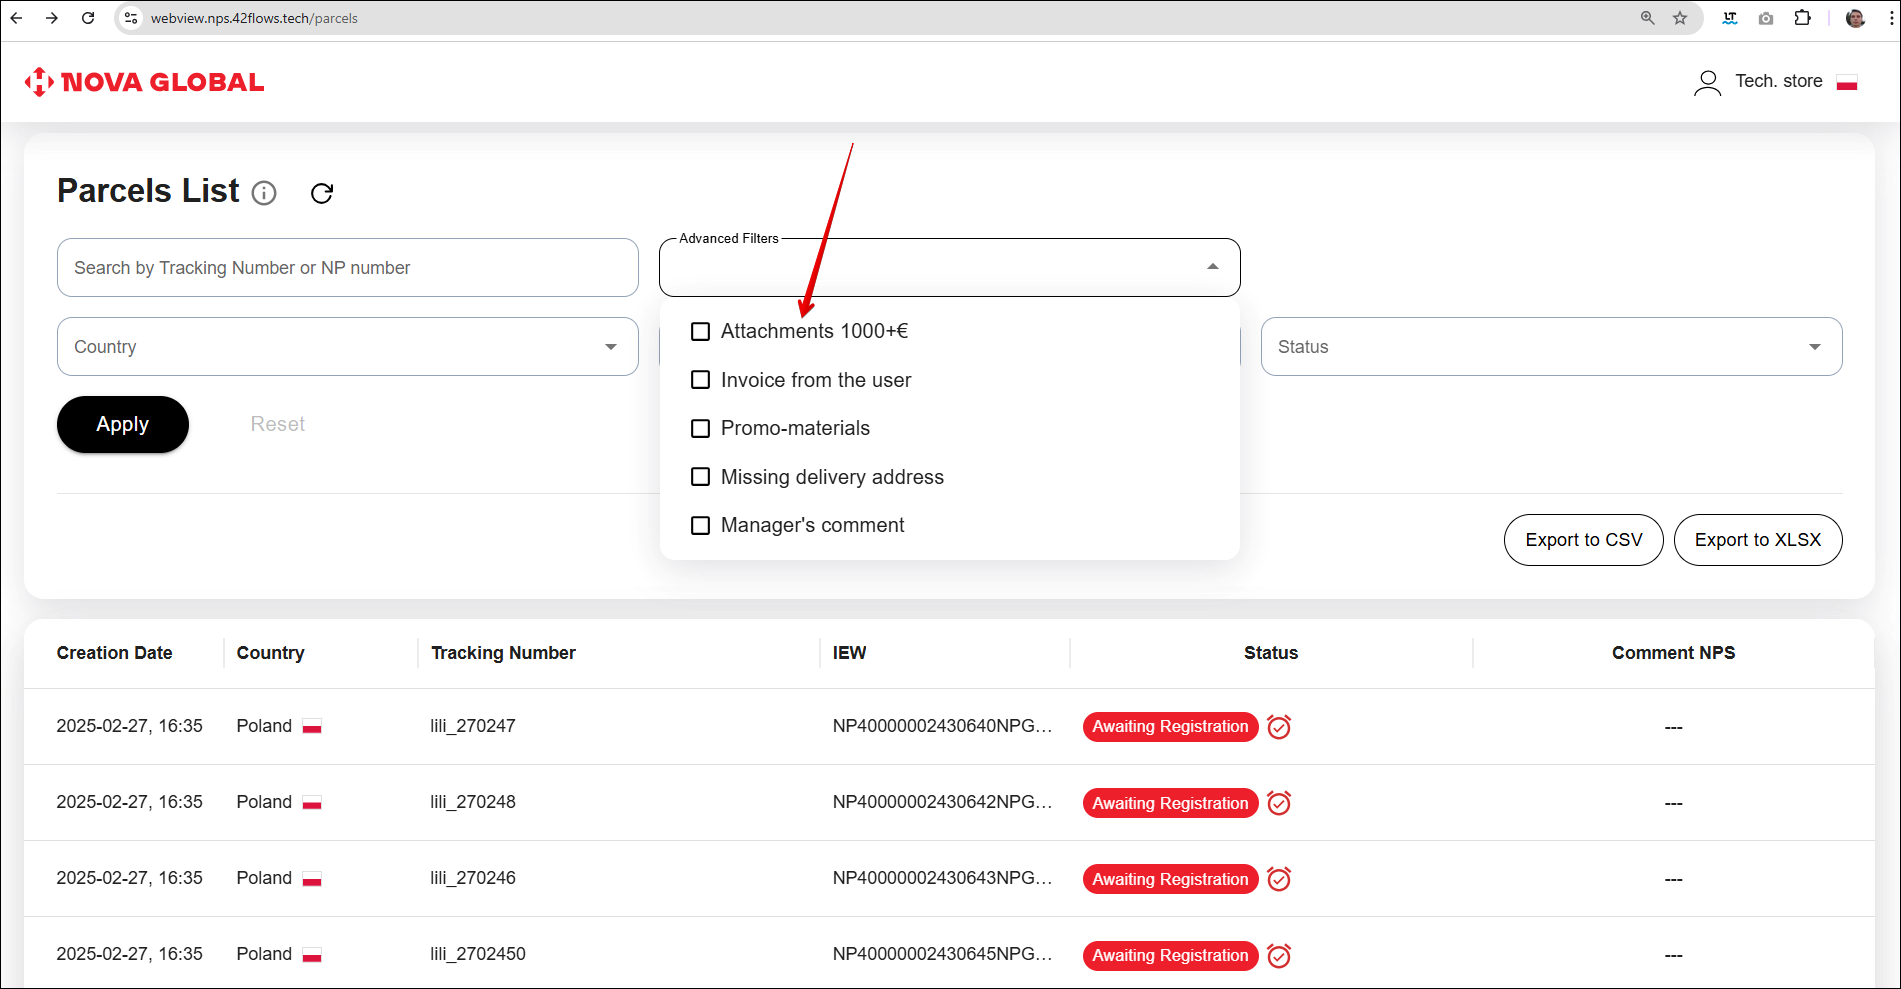
On the List of Parcels for Poland page, searching by tracking number or NP number, as well as using filters, works the same way as for parcels from any other country. However, the Attachments 1000+€ filter is available exclusively when searching for parcels from Poland.
Incorrect documents
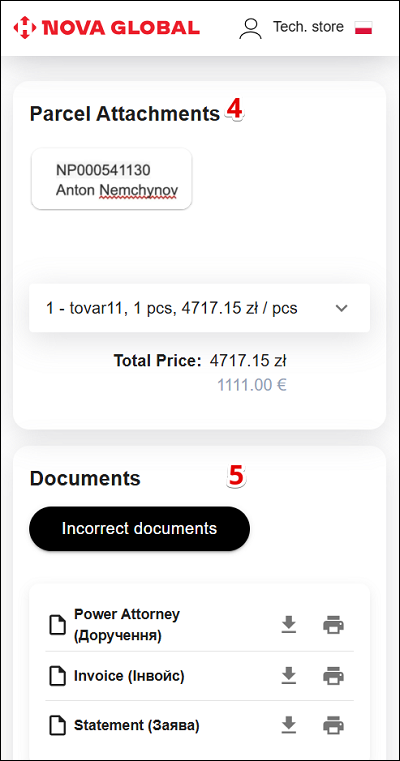
For parcels with the Documents €1000+ status , additional Parcel Attachments and Documents blocks are available.
| # | Title | Description |
|---|---|---|
| 1 | Parcel information | Allows you to view the following information about your parcel:
|
| 2 | Comment NPS | Allows you to view the manager's comment, if any. |
| 3 | Loaded Labels | Allows you to view the parcel's NP number, sender's details, and copy the following parcel data:
|
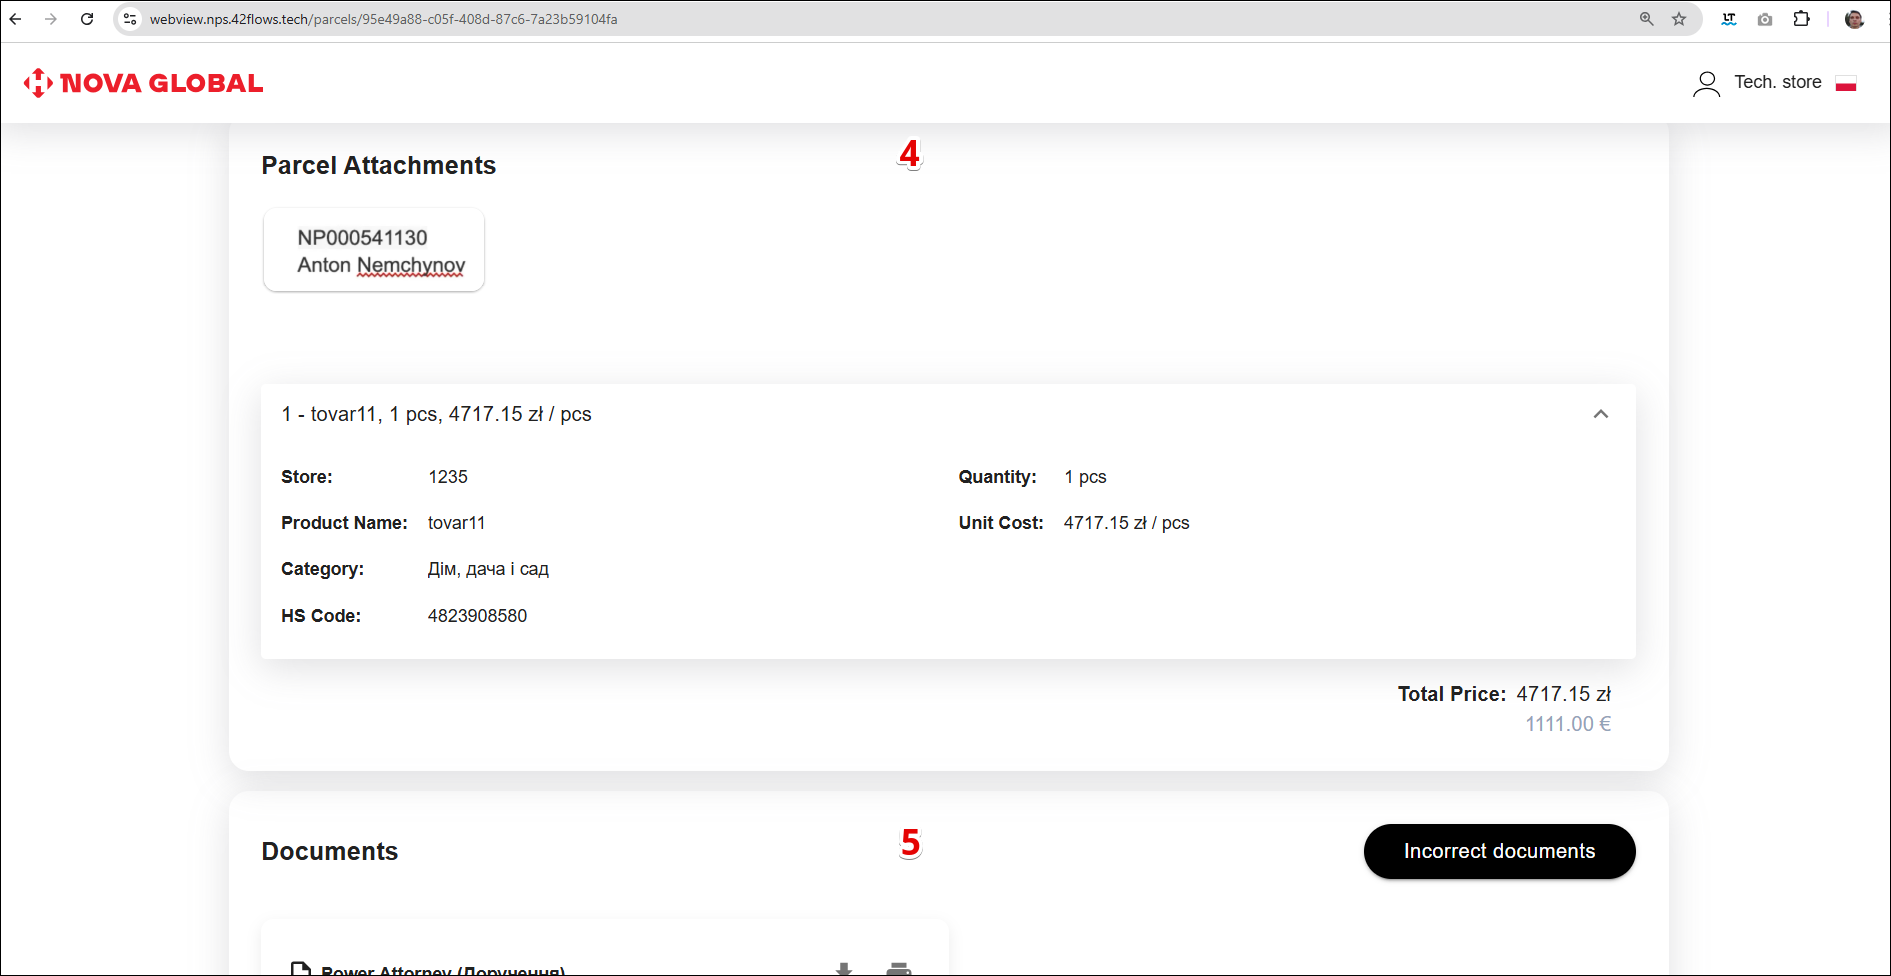
| 4 | Parcel Attachments | Allows you to view the NP number of the parcel, sender's data, and the following information about the shipment. |
| 5 | Documents | Allows technical staff to:
|
The following option is available during work with documents:
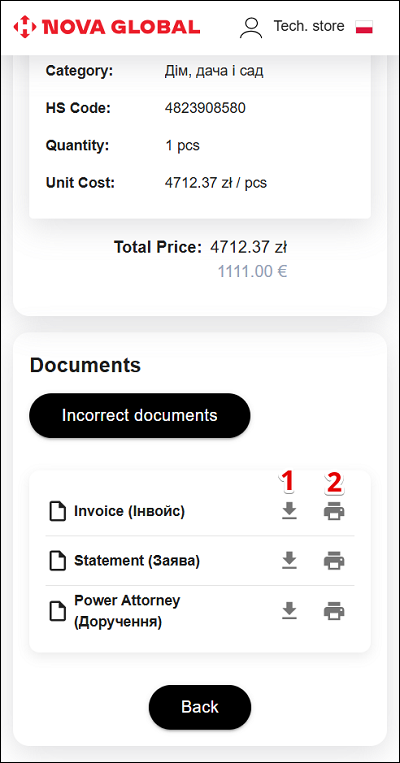
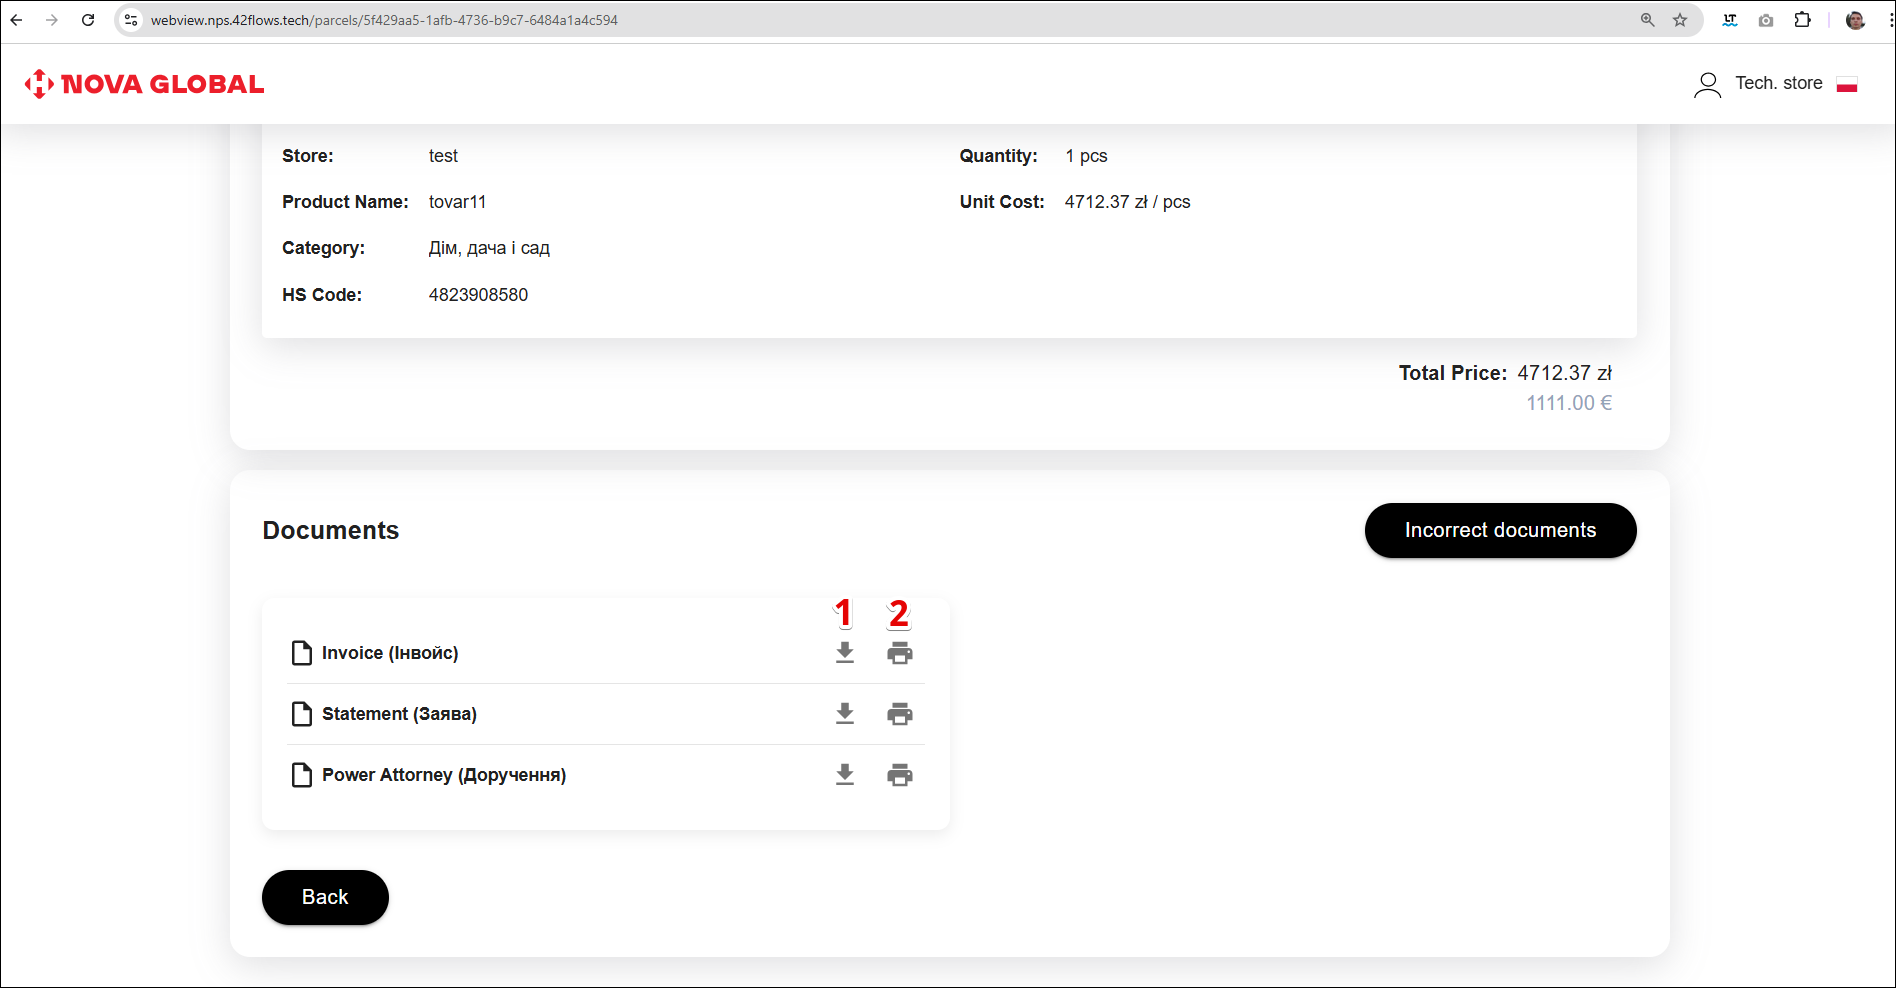
- 1 Download documents*.
- 2 Print documents.
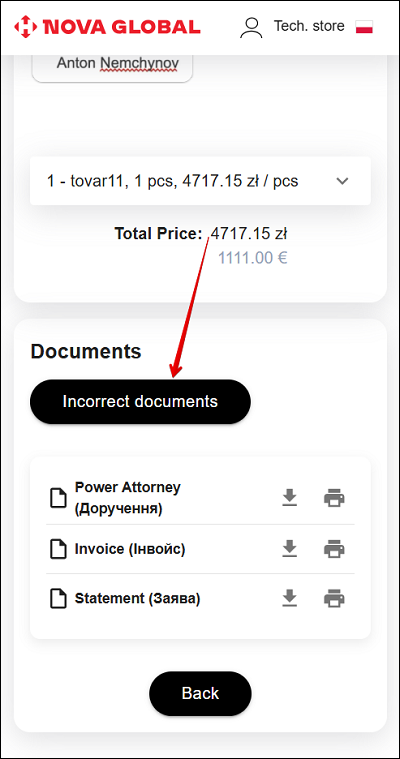
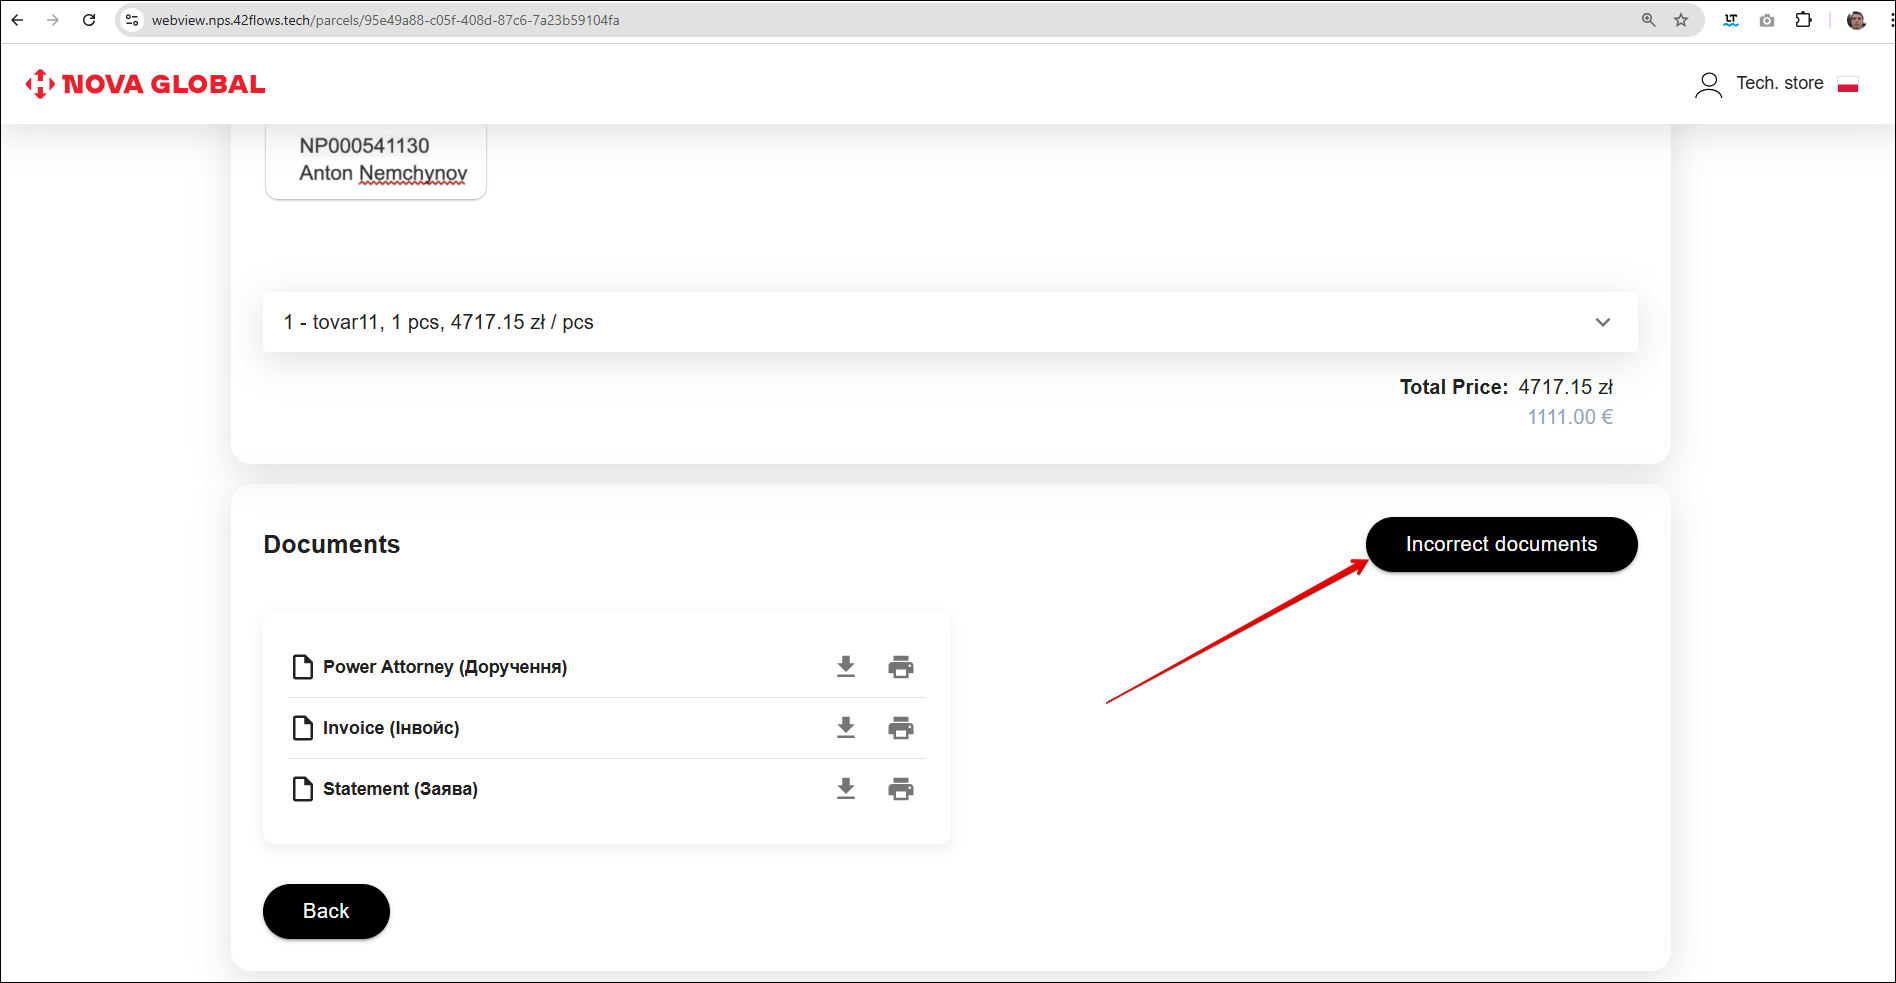
Additional checks and clarifications are needed for incorrectly completed documents.
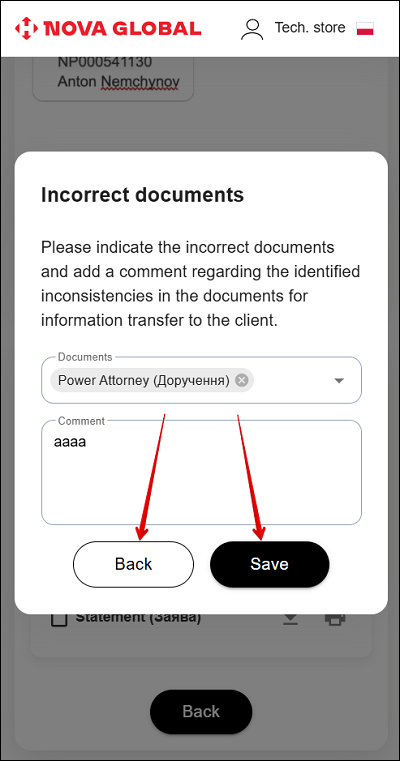
If incorrect documents were found, the Tech.store employee should mark such documents and add a comment. To perform these actions, click the Incorrect documents button.
In the Incorrect documents pop-up window, perform the following actions:
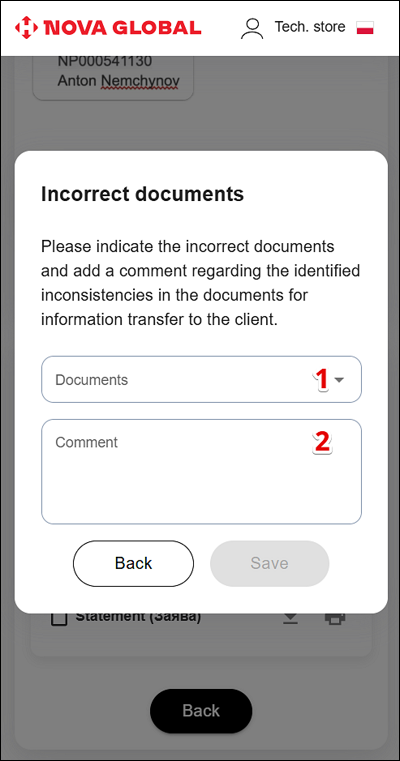
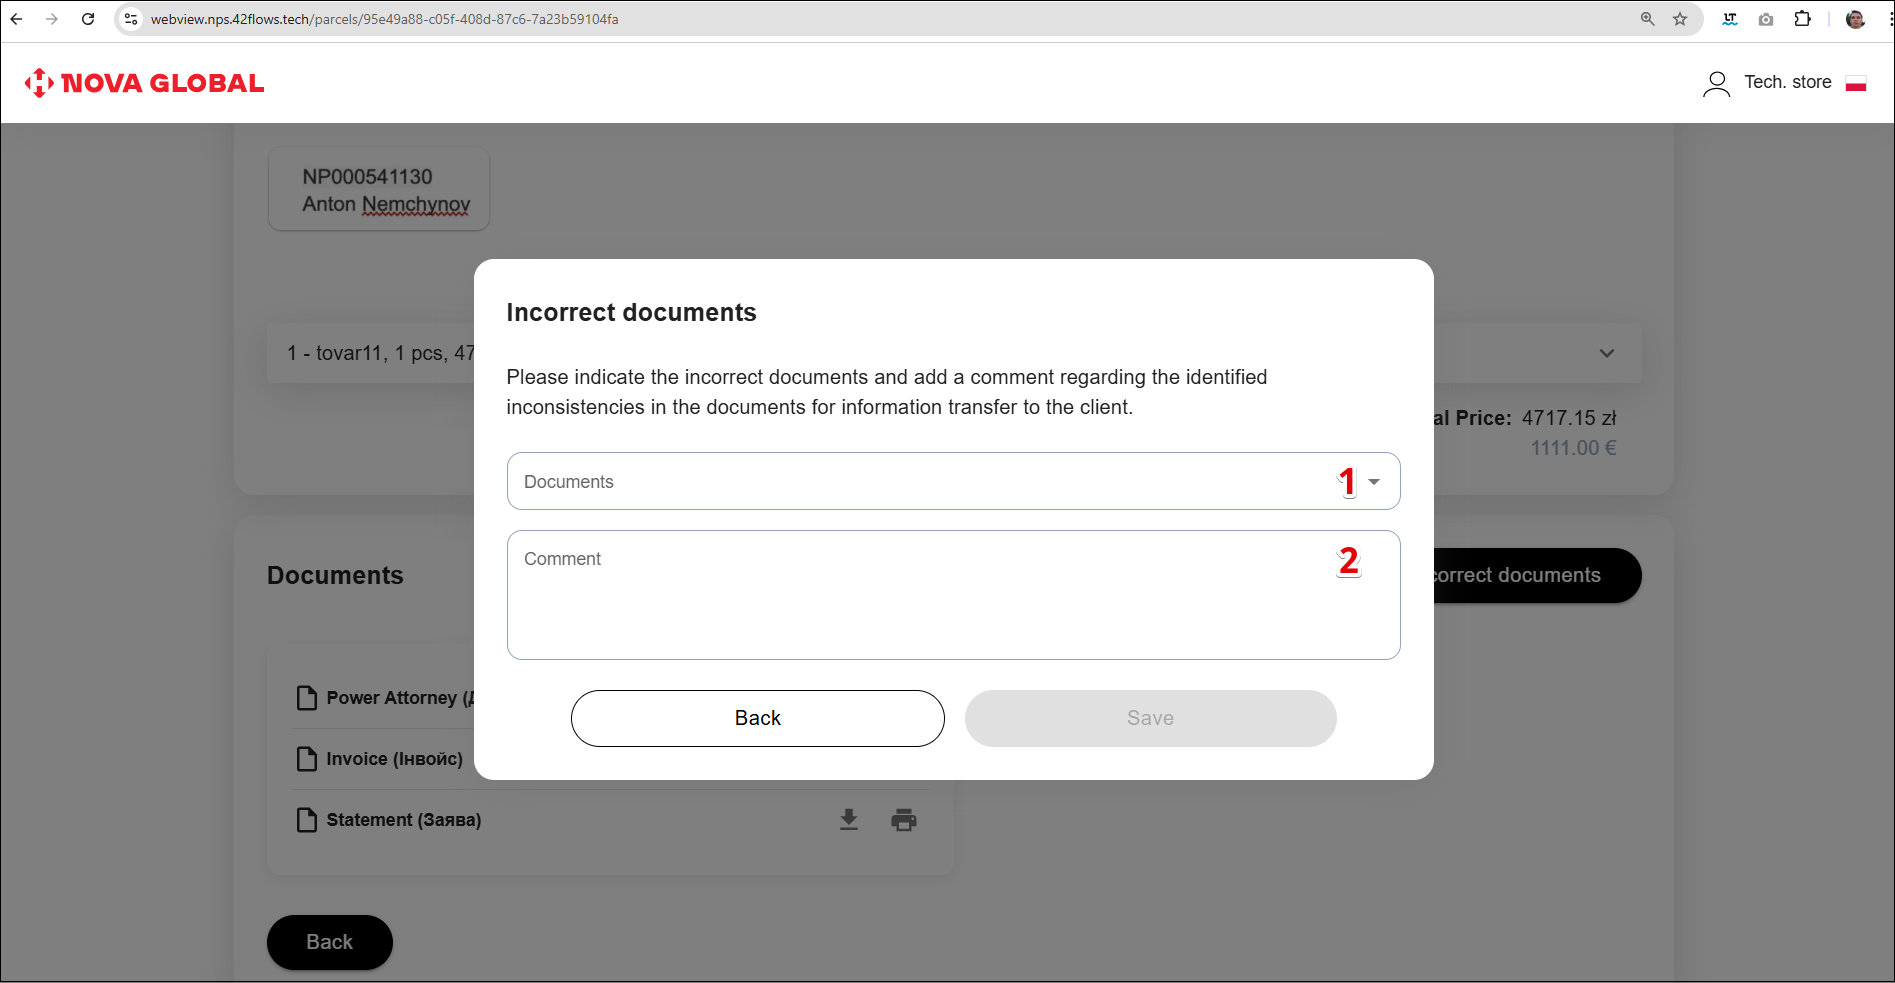
| # | Title | Action |
|---|---|---|
| 1 | Documents | Indicate incorrect documents by ticking the check box |
| 2 | Comment | Add a comment about any discrepancies in the documents for transferring information to the client |
To mark a document as incorrect, click the Documents field. In the drop-down list, tick the check box next to the desired document.
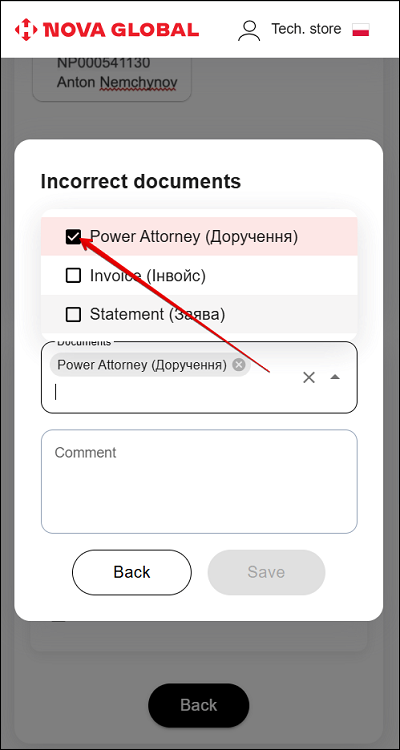
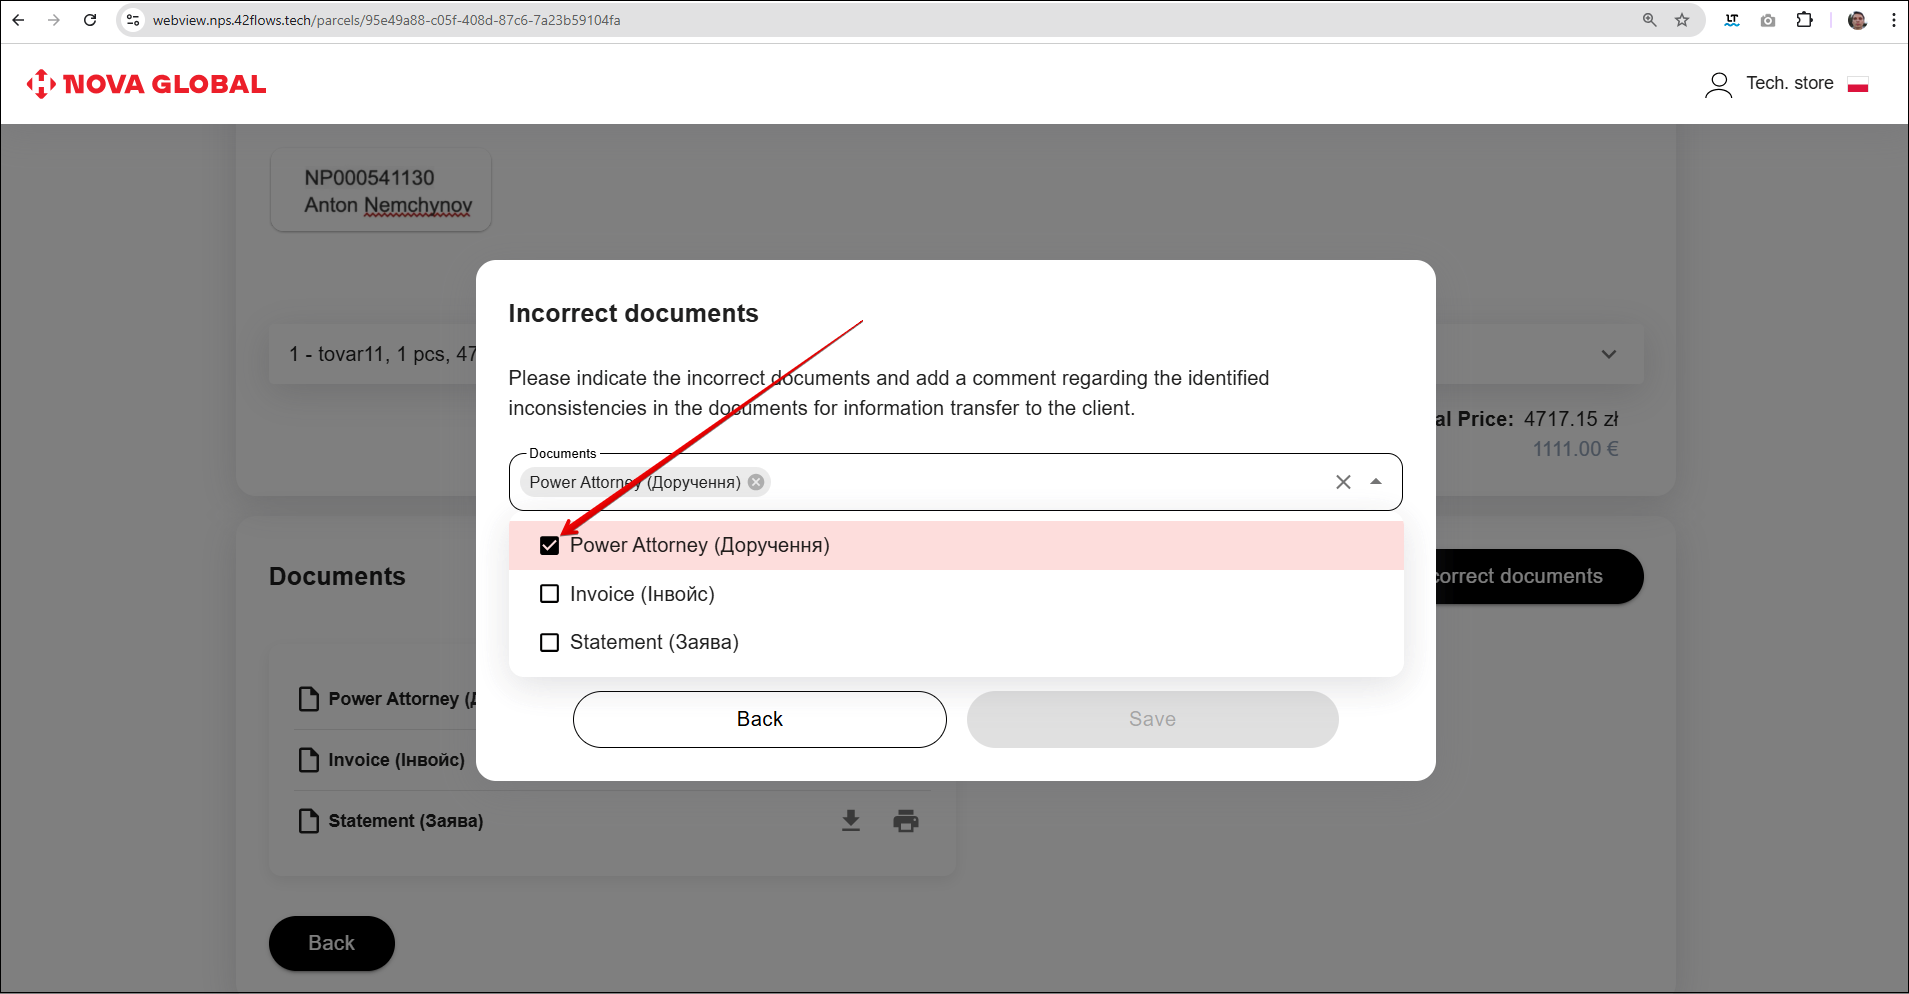
Add a comment in the corresponding Comment field.
The Documents and Comment fields are obligatory for filling
To save your comment, click the Save button. To return to the previous page, click the Back button.

A corresponding icon will appear on the document which was marked with an incorrect comment. The user will see that they need to reload this document.
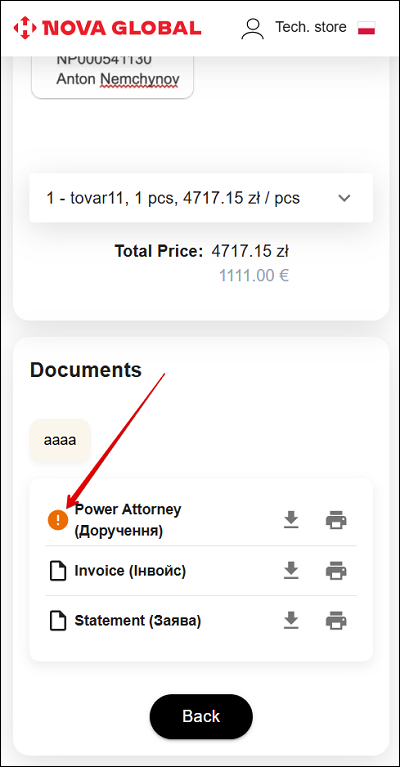
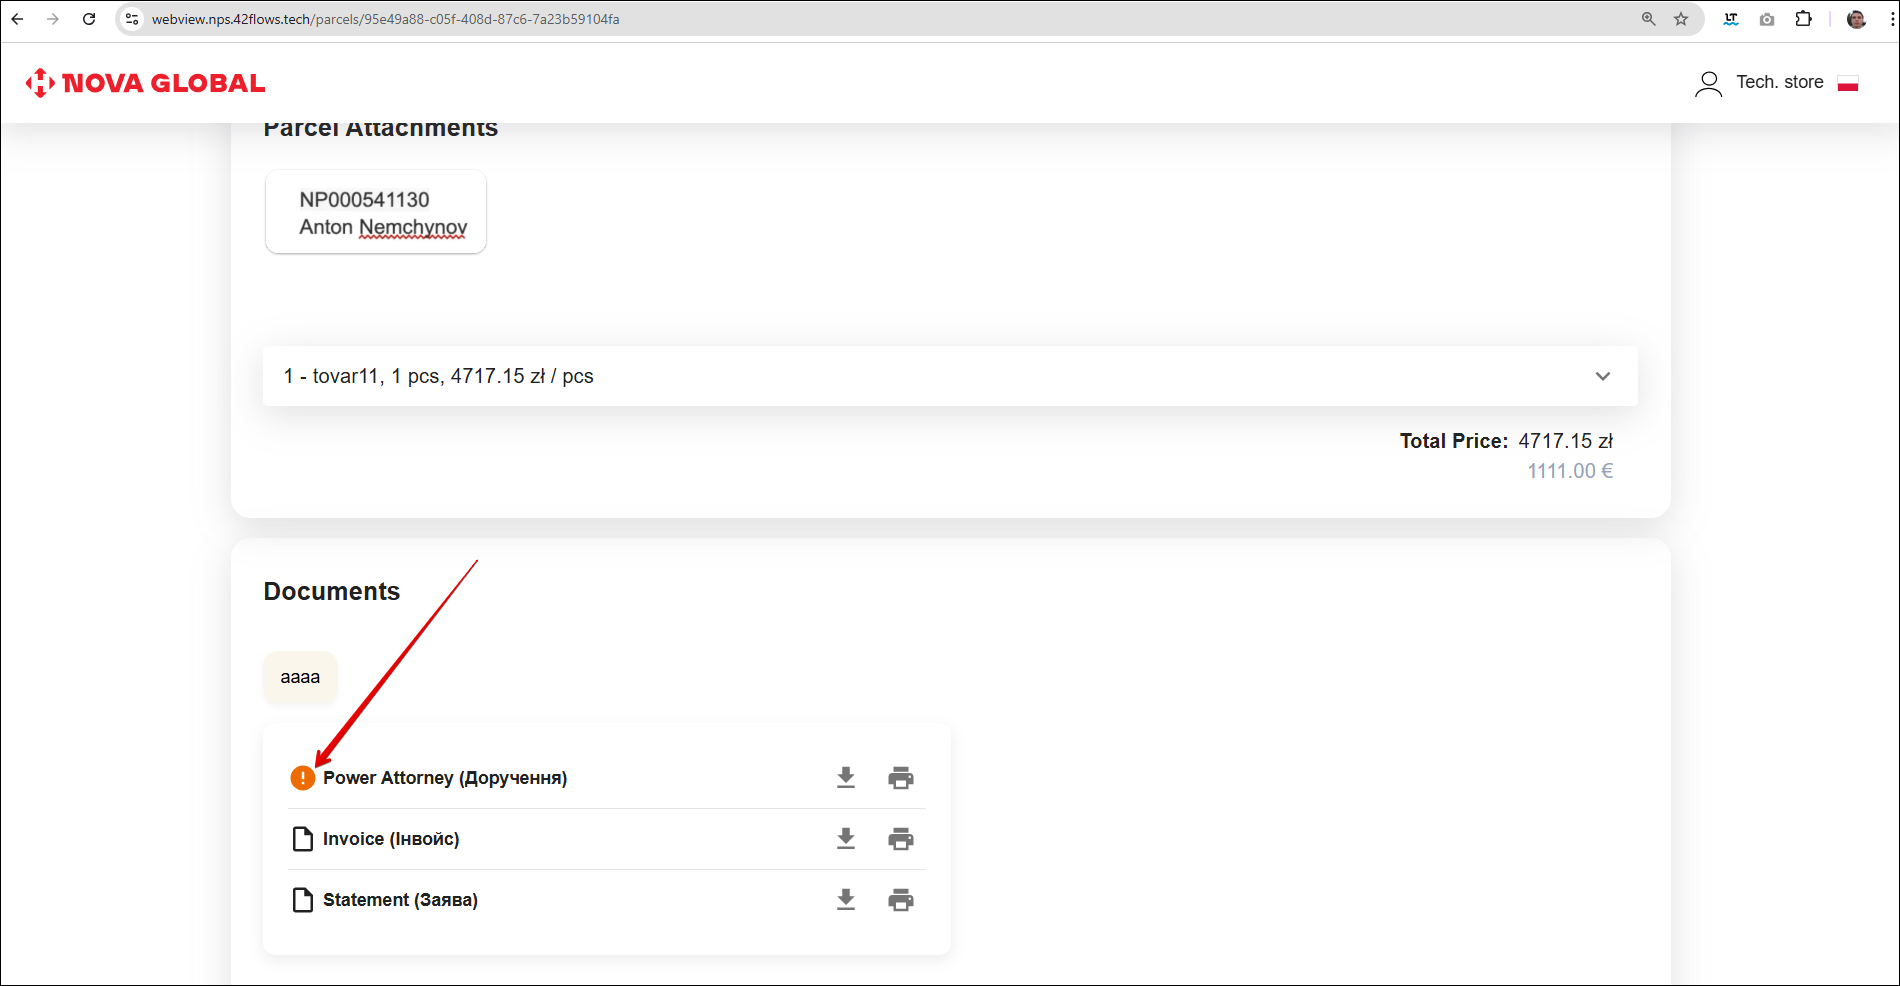
The button for addition of comments becomes active only after the user re-uploads the required documents
Until the recipient re-uploads the documents, the parcel status will remain changed from Documents 1000+ € to Waiting for Documents.
After the invalid documents are replaced, the option to comment on documents via the Invalid Documents button becomes available again.